DIY & Maintenance · 5 min read · 14 July 2026
How to Install a Drip Irrigation System: A UK Garden Step-by-Step
Drip irrigation waters your borders and pots at the roots while you do something better with your evening. Here is the full UK install: kit list, costs, ten numbered steps and the rules on hosepipe bans.
By the Nims Casa editorial team — written from professional cleaning experience and checked against our editorial standards.
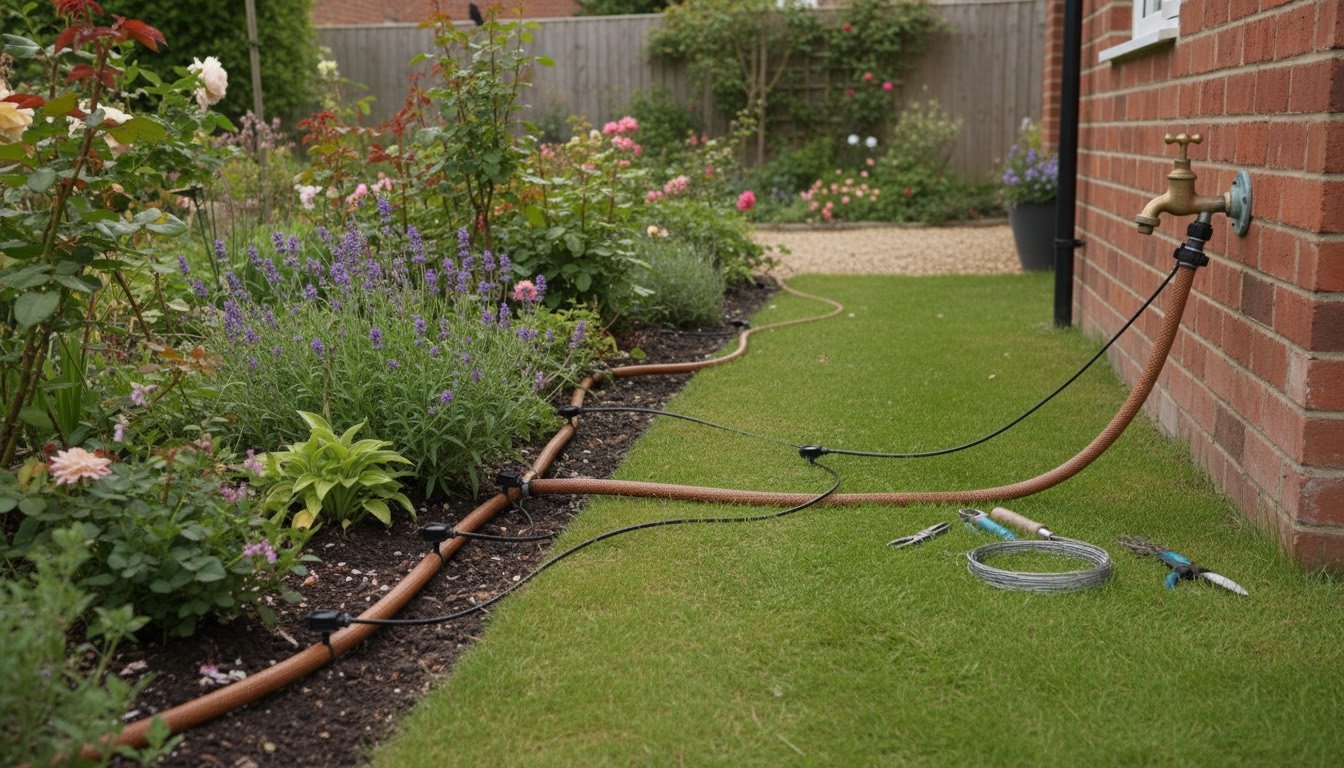
We look after a lot of gardens either side of clients' holidays, and the difference between houses with drip irrigation and houses relying on a guilt-ridden neighbour with a watering can is stark. Drip irrigation delivers water slowly, straight to the roots, using 30 to 50 per cent less than a sprinkler because almost nothing evaporates or lands on the path. It is also one of the most beginner-friendly garden projects: no digging, and no plumbing beyond the outside tap.
A typical 10-metre border with a dozen pots takes one person about three hours. Here is how we do it, what it costs, and when to stop and call a specialist instead.
Tools, materials, cost and skill level
Skill level: genuine beginner. If you can cut a hose and push a connector together, you can do this. Time: 2 to 4 hours for an average garden. Cost: a starter kit covering 10 to 15 pots or a small border runs £25 to £45 at B&Q, Screwfix or Toolstation; a full garden with timer, filter and pressure reducer lands between £80 and £150. Buy one brand throughout — 13mm fittings from different makers do not always mate properly.
- •13mm supply pipe (the main artery — buy 25m, you will use more than you think)
- •4mm micro tubing for branching off to pots and individual plants
- •Drippers: 2 litre/hour for pots, 4 litre/hour adjustable for shrubs and borders
- •Hole punch tool (usually in kits), tee and elbow connectors, end plugs and pipe pegs
- •Inline filter and pressure reducer — UK mains runs at 3 to 6 bar; drip systems want about 1.5 bar
- •Battery tap timer (£20 to £40) and a double check valve if your tap lacks one
- •Sharp secateurs or a pipe cutter and a tape measure
Plan the layout before you buy a single fitting
Sketch the garden and measure your runs — along the fence, around the patio, over to the pots. Then group plants by thirst, which designers call hydrozoning: pots dry out daily, established shrubs want a long soak twice a week, and Mediterranean planting barely wants anything. A thirsty hydrangea and a lavender on the same line means one of them loses. If a bigger overhaul is coming, lay irrigation while the beds are open — far cheaper than retrofitting, and worth building into any landscaping budget.
Account for soil and levels too. On heavy clay, slower 2 litre/hour drippers stop water pooling and running off; on sandy soil, shorter, more frequent cycles work better because water drains straight past the roots. On a slope, or where planting sits above a retaining wall, run the supply pipe along the top and use pressure-compensating drippers, otherwise the lowest dripper floods while the highest dribbles. Raised beds are the easiest win of all — one 13mm loop with drippers every 30cm and they practically look after themselves.
Installation: the ten steps
Do this on a warmish day — cold 13mm pipe fights you at every connector. Uncoil it and leave it in the sun for half an hour first.
- •1. Build the tap end in this order: tap, double check valve, timer, filter, pressure reducer, hose connector. That order protects your drinking water and the timer's innards.
- •2. Lay the 13mm supply pipe loosely along the planned route and let it relax into position before cutting anything.
- •3. Cut and join with tees and elbows where the route branches or turns; peg the pipe down every metre.
- •4. Flush the open line for a minute before fitting end plugs — grit is the top cause of blocked drippers on day one.
- •5. Fit the end plugs, then walk the line and punch holes wherever a plant or pot needs water.
- •6. Push drippers straight into the 13mm pipe for border plants; for pots, punch in a 4mm barb, run micro tube into the pot and stake a dripper at the base.
- •7. Run the system for ten minutes and inspect every joint and dripper. A fine mist from a joint means it is not seated — push, do not tape.
- •8. Adjust flow: 2 litres/hour on pots, 4 on shrubs, one dripper per 30cm of hedge or veg row.
- •9. Cover the pipework with 5cm of bark or compost. The right mulch hides the pipe, protects it from UV and roughly halves evaporation.
- •10. Set the timer and leave it alone for a week before fine-tuning.
Timer settings that work in a British summer
Water between 5am and 7am. Evening watering in a humid British July leaves foliage wet overnight — an open invitation to slugs and fungal disease. Starting points in a dry spell: pots for 10 to 15 minutes daily, borders for 45 to 60 minutes twice a week. Deep and infrequent beats little and often for anything with real roots — the same principle as watering a lawn properly. After rain, skip a cycle manually or add a £25 rain sensor.
On hosepipe bans: most UK water companies exempt drip irrigation fitted with a pressure reducer and timer from a Temporary Use Ban, precisely because it is so efficient — but wording varies by supplier, so check yours. On a meter, a drip system typically pays for itself within a season or two against a sprinkler left running.
Maintenance and winter care
Rinse the filter monthly through summer and flush the lines by removing the end plugs and running the tap for a minute. In hard water areas the same limescale that furs your kettle slowly throttles drippers — an hour's soak in warm white vinegar usually revives them. Before the first frost, drain the system and bring the timer indoors with its batteries out; the pegged pipe winters outside perfectly well once empty. Recommission in April with a flush and a joint check.
DIY vs pro: when to stop
A tap-fed surface drip system is squarely DIY territory — the pros are not doing anything you cannot. Stop and get quotes when the job changes character: a buried multi-zone system with pop-up heads for a large lawn, a full sprinkler system needing trenching and its own controller, or anything tapping the mains before the outside tap, which brings the Water Supply (Water Fittings) Regulations into play. Designed multi-zone installs run £300 to £800; pop-up lawn systems start around £1,500. No outside tap at all? Fitting one is a £80 to £150 plumber's job — the best money in the whole project.
One honest caveat: a drip system is not fit-and-forget in year one. Walk the line weekly for the first month — a fox, a mower wheel or a popped dripper can quietly drown one corner of a bed. After that, it is the closest thing gardening has to autopilot.
Found this useful?
There's plenty more — hundreds of guides and honestly-tested product reviews for every corner of your home.
Browse All Guides