Carpets & Flooring · 6 min read · 7 May 2026
How to Install a Tile Floor: The UK Step-by-Step Guide (Substrates, Costs and When to Stop)
Tiled floors almost never fail at the tile. They fail at the substrate underneath. Here is the sequence a UK tiler actually follows, with real costs, and the point where you should put the trowel down.
By the Nims Casa editorial team — written from professional cleaning experience and checked against our editorial standards.
Lift a cracked bathroom or kitchen floor and the ceramic is usually blameless. The fault is underneath: chipboard that flexed, a screed that was still giving off moisture, or a thin smear of adhesive that only touched 40 per cent of the tile back. Prepare the base properly and the tiling itself is slow, fiddly and entirely learnable.
This is the sequence for a domestic floor in a UK house, whether that is suspended timber in a Victorian terrace or a sand-cement screed in anything newer. It assumes ceramic or porcelain up to roughly 600 x 600mm; stone, slabs over 900mm and anhydrite screeds have extra rules, flagged where they matter.
Safety first: asbestos, silica and the Part P line
The three genuine hazards on a UK tiling job are all in the preparation, not the laying.
Regulation bites in one specific place. Adding electric underfloor heating to a bathroom or shower room in England or Wales is work in a special location, and the connection is notifiable under Part P of the Building Regulations. Use a registered electrician who can self-certify through NICEIC or NAPIT, or notify building control and pay the inspection fee first. You may lay the mat yourself; you cannot sign off the final connection.
- •Asbestos: pre-2000 thermoplastic or vinyl floor tiles, and the black bitumen adhesive under them, commonly contain chrysotile. Do not sand, grind or smash them. Lift whole where possible, double-bag, and book disposal at a council site that accepts asbestos.
- •Silica dust: dry-cutting porcelain throws respirable crystalline silica. Cut outside on a wet saw, or wear an FFP3 mask and use dust extraction. A paper nuisance mask is useless here.
- •Cement burns: tile adhesive is strongly alkaline. Wear nitrile gloves and knee pads, and rinse splashes off skin immediately.
- •Waste: an 8m2 floor of old tile and screed can weigh over 400kg. A mini skip on the public highway needs a council permit, typically £30 to £90 plus lights and cones.
Tools and materials
Buy adhesive on specification, not price. Anything over timber, over underfloor heating or onto porcelain needs a flexible cement-based adhesive classified C2 S1 to BS EN 12004. A cheap bag of standard wall adhesive on a suspended floor is the commonest cause of drummy, cracking tiles.
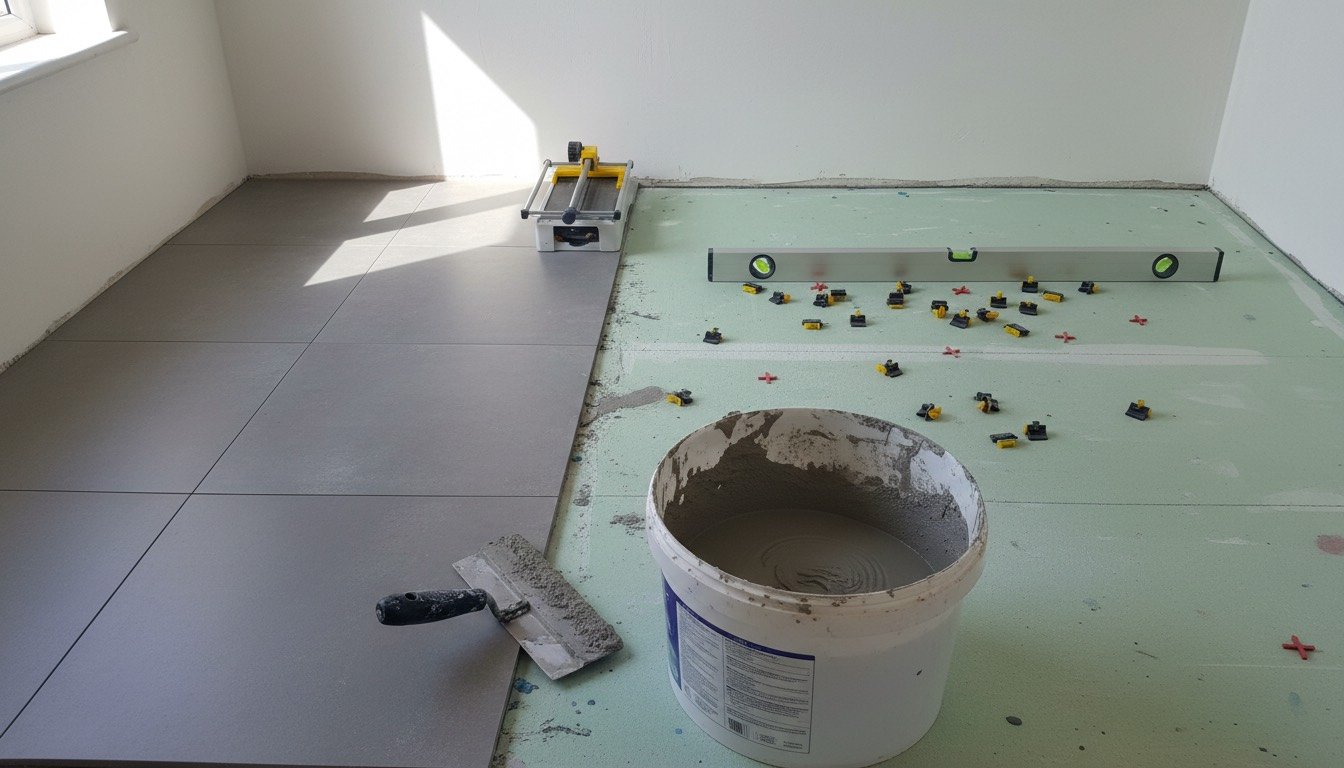
- •12mm notched trowel (10mm for tiles under 300mm), plus a small margin trowel
- •Manual score-and-snap cutter for ceramic; a hired electric wet cutter for porcelain, around £25 to £35 a day
- •1.2m spirit level or a laser level, plus a chalk line and a long straightedge
- •Levelling clip system, 2mm or 3mm spacers, and a rubber mallet
- •Bucket, mixing paddle on a slow-speed drill, grout float, and two large sponges
- •6mm tile backer board and 40mm backer board screws for timber floors
- •Acrylic primer, C2TE S1 adhesive, flexible grout and a colour-matched silicone
Realistic time and cost
For a typical 8m2 UK bathroom, budget three days, not a weekend: strip, prime and board on day one; set out and lay on day two; grout and silicone on day three. Materials come to roughly £280 to £420. Porcelain runs £18 to £45 per m2 at Topps Tiles, Tile Giant or Wickes, budget ceramic from about £10, and a 20kg bag of S1 adhesive is £16 to £26 covering 4 to 5m2 at a 6mm bed.
A tiler charges £30 to £55 per m2 for standard formats and £45 to £85 for large format, herringbone or stone, on day rates of £180 to £280 outside London and £250 to £350 inside the M25. Weigh that against wider flooring installation costs before assuming DIY saves what it appears to.
The steps, in order
- •1. Check the substrate. Sand-cement screed cures at roughly 1mm a day for the first 50mm, so a 65mm screed is not ready for about 75 days. Anhydrite screeds need laitance sanding and a moisture test below 0.5 per cent.
- •2. Stiffen timber floors. Screw down loose boards, then overboard chipboard or floorboards with 6mm tile backer board bedded in adhesive and screwed at 200mm centres.
- •3. Prime. Dilute acrylic primer on porous screeds, neat on backer board. Let it go tacky, usually 30 to 60 minutes.
- •4. Set out dry. Find the centre lines, then shift them so you never end on a sliver: aim for cuts of at least half a tile against the most visible wall.
- •5. Mix small. One bag at a time, to a stiff peanut-butter consistency, left to slake for five minutes and remixed.
- •6. Spread no more than 1m2 at a time. Adhesive open time is 20 to 30 minutes and skins over faster in a warm room.
- •7. Back-butter every tile over 300mm. BS 5385-3 wants a solid bed with no voids; in a bathroom aim for full coverage and lift the first tile to check.
- •8. Use levelling clips and check as you go. Maximum acceptable lippage is 1mm with joints under 6mm, and the eye spots more than that instantly.
- •9. Leave a 6mm gap at every wall, threshold and upstand. Fill it later with silicone, never grout.
- •10. Cure, then grout after 24 hours with a flexible grout, working diagonally across joints. Sponge off haze within 20 minutes.
- •11. Silicone the perimeter and any bath or shower junction using the same technique as replacing sealant around a bath.
- •12. Wait seven days before switching on underfloor heating, then raise the temperature by 5C a day.
Troubleshooting
- •Hollow-sounding tiles: voids under the bed. If they are isolated and not moving, leave them. If they are in a traffic route, lift and relay before they crack.
- •Cracks running dead straight across several tiles: substrate movement, not tile failure. Look for a joist line, a screed joint, or a missing movement joint. Domestic floors need them at doorways and over about 40m2.
- •Grout cracking at the walls: you grouted the perimeter instead of siliconing it. Rake it out and reseal.
- •Patchy grout colour: sponged too wet, or unsealed porous tiles pulling water out of the joints unevenly.
- •Dull, gritty film after cleaning: grout haze. Remove with a mild acidic grout haze remover after seven days, never before. Longer term, keeping grout clean is mostly about sealing and avoiding bleach.
When to call a professional
Stop if the joists sit at wide centres or feel noticeably springy: 20mm porcelain plus bedding adds around 55kg per m2, and strengthening joists falls under building control. Stop if you find suspected asbestos tiles or bitumen adhesive. Stop at the electrical connection for bathroom underfloor heating, which is Part P notifiable. And stop if the floor needs levelling compound deeper than 25mm, or the slabs exceed 900mm, where a two-person suction lift stops being optional.
Landlords carry an extra duty. Under the Housing Health and Safety Rating System, a raised tiled threshold that trips people is a reportable falls hazard, so plan the finished floor height against existing doorways before buying a single tile. If this is your first tiling job, do a kitchen splashback first, then read the wider list of flooring installation mistakes.
Found this useful?
There's plenty more — hundreds of guides and honestly-tested product reviews for every corner of your home.
Browse All Guides