DIY & Maintenance · 5 min read · 9 July 2026
How to Replace a Water Heater Anode Rod (UK Cylinder Guide)
The £25 sacrificial rod inside a steel hot water cylinder quietly rusts so the tank does not. Here is how to check and replace it — and when UK regulations mean you should put the spanner down.
By the Nims Casa editorial team — written from professional cleaning experience and checked against our editorial standards.
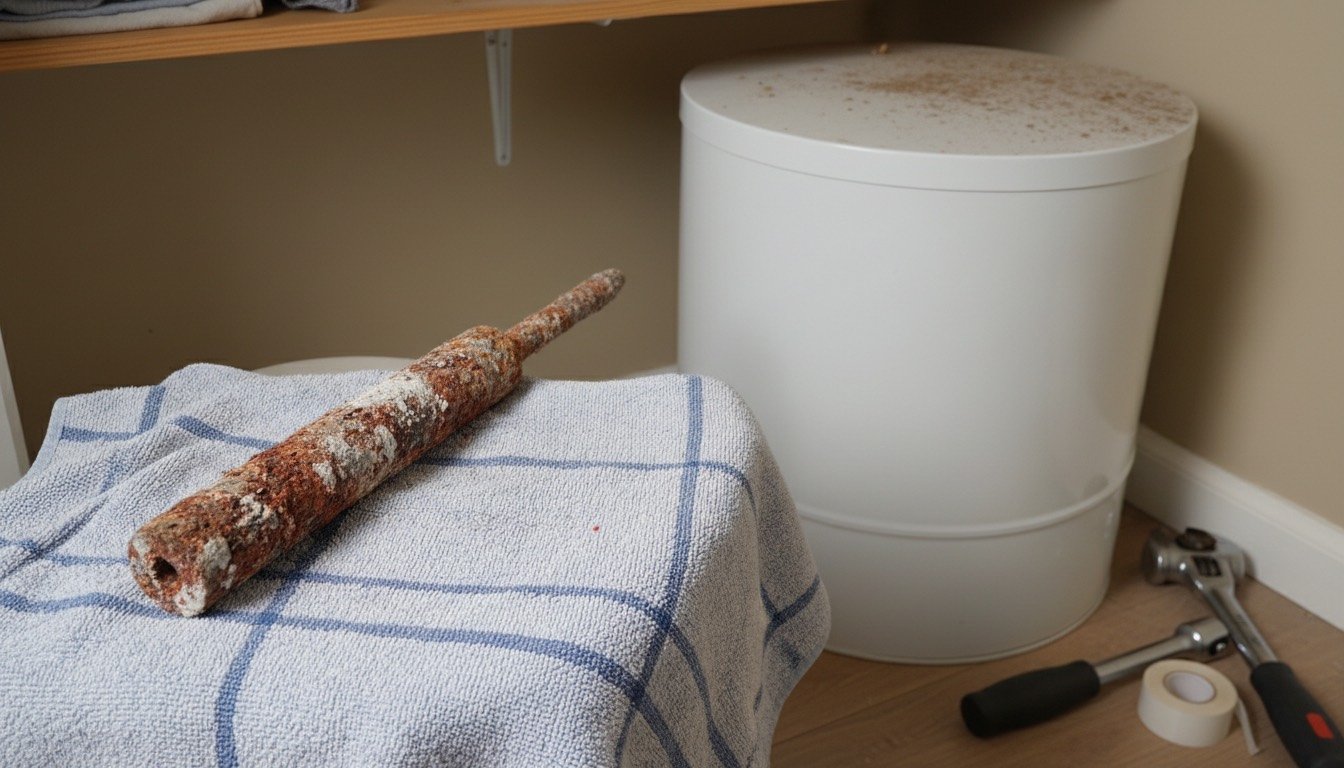
Inside every glass-lined steel hot water cylinder is a metal rod with one job: to corrode. The sacrificial anode attracts the electrochemical attack that would otherwise eat the tank itself, and once the rod is spent, the cylinder starts rusting from the inside out. A £25 part, checked every couple of years, is often the difference between a cylinder that fails at year eight and one that sails past twenty.
One honest caveat before anyone picks up a spanner: not every UK home has an anode. If you run a combi boiler there is no stored cylinder at all — our tank vs tankless cost comparison explains the difference. This guide is for homes with a cylinder — starting with whether yours has a rod at all.
Does Your Cylinder Actually Have an Anode Rod?
British hot water storage comes in three flavours, and only some use a sacrificial anode. Older vented copper cylinders — fed by a cold tank in the loft — generally do not need one, because copper resists corrosion on its own. Duplex stainless steel unvented models are usually designed to run anode-free, while glass-lined mild steel cylinders (common in heat pump installations and many budget unvented units) rely on a magnesium anode that is absolutely a service item.
The definitive answer is in the installation manual, which every manufacturer publishes online. Look for sacrificial anode in the parts diagram, note the thread size and where it sits — usually a hex-headed plug in the top dome, sometimes hidden under a plastic cap or foam insulation. If the manual gives an inspection interval, that is your schedule; otherwise work to every two to three years.
Tools, Materials, Time and Cost
This is an intermediate job: one stubborn nut, some controlled draining and a bit of patience. Allow 60 to 90 minutes the first time.
- •27 mm (1-1/16 inch) deep socket on a 1/2 inch breaker bar — an ordinary ratchet rarely shifts a factory-tightened anode
- •Replacement rod: magnesium £20–£40, aluminium-zinc £25–£45, powered titanium £90–£150 (fit-and-forget)
- •PTFE tape (thread seal), one full roll
- •Garden hose for a partial drain via the drain cock, plus old towels
- •Torch, step ladder and a helper to brace the cylinder while you heave
- •Total DIY cost: roughly £25–£55; a plumber typically charges £90–£160 including the rod
The G3 Rule: When This Is Not a DIY Job
Here is where UK regulations part company with the American videos on the internet. Unvented cylinders — the pressurised type with no loft tank, running at mains pressure of around 3 bar — fall under Building Regulations Part G3, and work on them must be done by a G3-qualified engineer. For good reason: 200 litres at 65°C under pressure is dangerous if a safety valve or expansion vessel is faulty.
The practical answer for unvented owners is the annual service you should be booking anyway: anode inspection is part of it, and at £80–£150 it costs less than the call-out after something lets go. Our guide to what plumbers charge by job gives realistic figures. The steps below are for cylinders you may legally and safely work on yourself: vented systems with a serviceable anode, or one fully isolated and depressurised.
Step-by-Step: Replacing the Rod
Work methodically, and never let an immersion heater run on an empty cylinder — a dry element burns out in seconds.
- •1. Kill the heat source. Switch the immersion heater off at its fused spur and turn off the boiler's hot water programme.
- •2. Isolate the cold feed. Close the gate valve feeding the cylinder; on a vented system with no valve, tie up the ballcock in the loft tank.
- •3. Relieve the pressure. Open the hot tap nearest the cylinder until flow stops completely.
- •4. Partially drain. Hose on the drain cock, let out 10–15 litres — the anode enters through the top dome, so the level only needs to drop below the boss.
- •5. Expose the anode head. Peel back the insulation cap until the socket seats squarely on the hex.
- •6. Crack it loose. Steady, increasing anticlockwise force on the breaker bar while your helper braces the cylinder so it cannot twist on its pipework.
- •7. Withdraw the old rod slowly. Under a low ceiling you may need a flexible, segmented replacement — buy that type in advance if clearance is under a metre.
- •8. Read the old rod. Down to the steel core wire, pitted below 10 mm thick, or wearing a hard calcium jacket means it was overdue.
- •9. Fit the new one. Six to eight turns of PTFE tape on the thread, insert, hand-tighten, then pull it firmly snug with the socket — tight, not heroic.
- •10. Refill before power-up. Open the cold feed, keep the hot tap open until water runs without spluttering, check the boss for weeps, then restore power and heating.
Hard Water, Smelly Water and Choosing the Right Rod
Water chemistry decides how long your new rod lasts. In the soft water of Scotland, Wales and the North West, a magnesium anode can manage six years or more. In the aggressively hard water of the South East and East Anglia — the same water that furs kettles, as covered in our UK limescale guide — we have pulled rods that were skeletal at three years. Hard water areas: inspect every two years, no exceptions.
If your hot water smells of rotten eggs, the anode is usually the culprit: magnesium reacts with harmless sulphate-reducing bacteria in the tank, and swapping to an aluminium-zinc rod normally cures it within a fortnight. Powered titanium anodes are the premium fix — they emit a protective current instead of dissolving, and never need replacing.
When to Stop: Seized Rods and Dying Tanks
A rod untouched for fifteen years may be welded in place by corrosion. Two sensible escalations: a scaffold tube over the breaker bar, or an impact wrench, which shocks threads loose better than steady pull. Do not fight on while the boss deforms or the cylinder rocks on its connections — torn pipework turns a £25 job into a flood. If it will not move, stop and hand it to a plumber.
Know when the anode no longer matters. If the cylinder is weeping from a seam, rust-staining at the base, or past twelve years old with no service history, a new rod is embalming, not medicine — price the honest fix with our water heater replacement cost breakdown. And if the problem is no hot water rather than tank health, start with our no hot water troubleshooting guide before spending anything.
Done on schedule, this is the cheapest insurance in home maintenance: a £25 rod every few years against £1,300–£2,500 for a supplied-and-fitted cylinder. Write the date on the insulation cap, set a reminder for two years, and the tank will quietly outlive the boiler.
Found this useful?
There's plenty more — hundreds of guides and honestly-tested product reviews for every corner of your home.
Browse All Guides