Home Decor · 6 min read · 2 May 2026
How to Choose a Paint Colour: The Step-by-Step Method UK Decorators Use
Most paint 'colour mistakes' are actually light mistakes, sheen mistakes, or the result of judging a 30ml dab over the last owner's magnolia. Here is the method that removes the guesswork.
By the Nims Casa editorial team — written from professional cleaning experience and checked against our editorial standards.
Nearly every repaint we get called back to fix was chosen the same way: a card held up in a bright showroom, a dab of tester onto an existing wall, a decision made on a sunny Saturday. Then November arrives and the warm greige that looked like linen in the shop reads as cold putty.
The British problem is not taste, it is daylight. We get diffuse, blue-shifted light for much of the year, and our housing stock is full of small north-facing rooms with one window. Choosing well is a testing process, not an act of inspiration — and there are real safety checks before you touch the old paintwork.
Safety first: three checks before you open a tester
Choosing a colour sounds harmless, but sanding a patch to see what is underneath can create a real hazard. Clear these three first.
- •Pre-1992 paintwork: lead was restricted for domestic decorative paint in the UK in 1992 and is common on woodwork last decorated before the 1970s. Never dry-sand it or take a hot air gun to it — see lead paint safety in old houses.
- •Pre-2000 textured coatings: Artex and similar may contain chrysotile asbestos. Do not sand, scrape or wire-brush. A UKAS lab sample costs roughly £30-£50.
- •Damp and mould: paint does not cure damp. If there is a tide mark above the skirting, fix the cause first. Fresh plaster needs four to six weeks to dry before a mist coat.
Tools and materials you actually need
This is testing kit, not decorating kit. Spend is usually £25-£45 and it saves an entire repaint.
- •Three to five tester pots (Dulux and Crown about £2-£3 for 30ml; Farrow & Ball and Little Greene £6-£8)
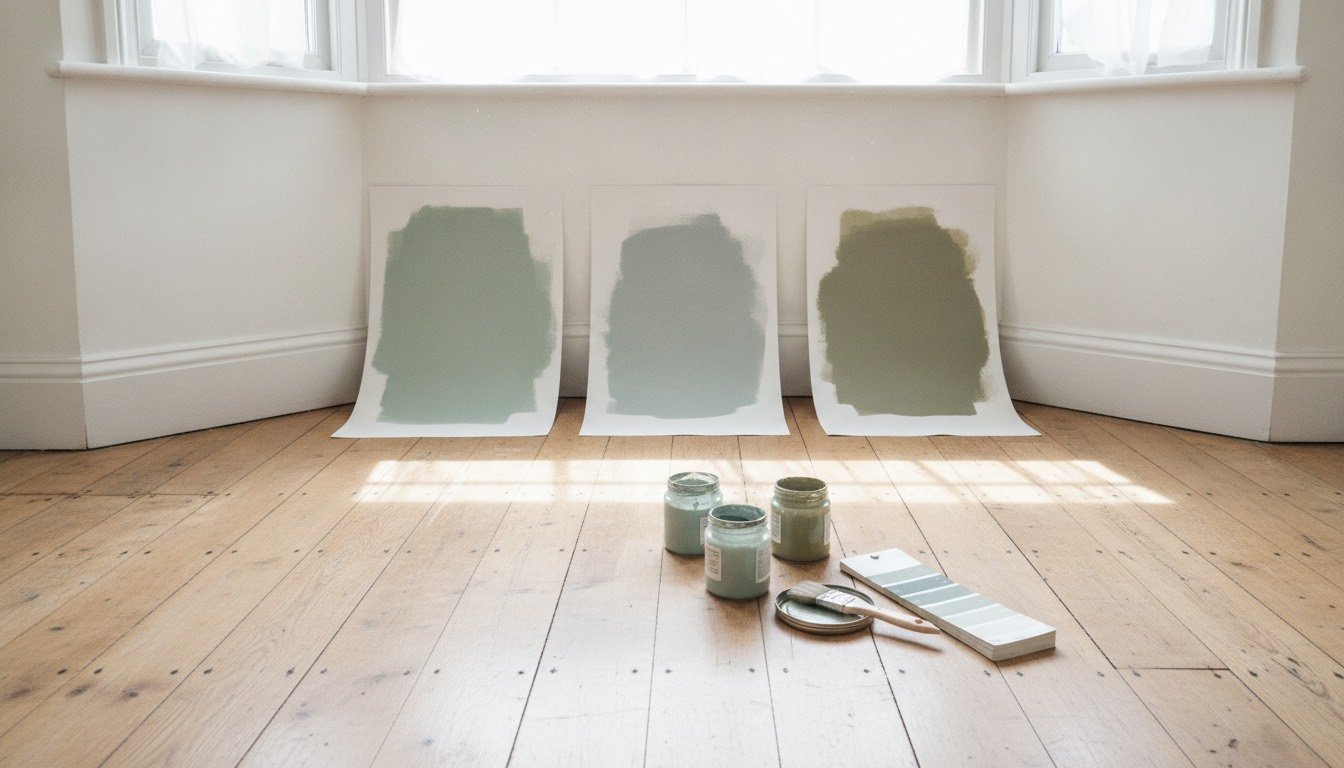
- •A2 white lining paper or white card, two sheets per colour — never test onto an existing colour
- •A 25mm synthetic brush, a jam jar lid for decanting, a tape measure and a compass app
- •The manufacturer's card showing LRV (Light Reflectance Value) — Dulux Trade, Little Greene and Farrow & Ball all publish it
- •Optional: peel-and-stick sample squares, £2-£4 each, for zero mess
Realistic time and cost
Budget a fortnight of calendar time and about two hours of work. Rushing the observation window is where people go wrong: you need the colour on a bright day, a flat grey day, and under your evening lighting.
A UK bedroom of 4m x 3.5m with a 2.4m ceiling gives roughly 32m² of wall after openings. Two coats of matt at 12-14m² per litre means about 5 litres — a 5L tin of retail matt at £30-£40, or £110-£120 in a heritage brand. Work yours out with how much paint do I need.
- •Applying testers: 30 minutes. Observation: 3-7 days, or 10-14 if the room faces north
- •Painting the room: one full day for a competent DIYer, including prep
- •Decorator day rate in 2026: £160-£240 outside London, £220-£300 inside the M25
- •In-home colour consultation: £150-£350, or free to £75 via some paint brands
The nine-step method
Follow this in order. The first three steps do most of the work and cost nothing.
- •1. Find the aspect with a compass app at the main window. North-facing rooms get cool blue-grey light all day and drain warmth from any colour; south adds yellow; east is warm at breakfast, cold by tea time; west is the reverse.
- •2. Set an LRV target first. LRV runs 0 (black) to 100 (pure white). In a small north-facing room stay above 55 or it feels like a cave in winter; for a moody snug, 15-30 is where the drama lives.
- •3. Correct for aspect, not fashion. In north light pick warm undertones — yellow, red or soft green base — because daylight cools them two or three perceived steps. South light takes true greys and blues.
- •4. Match the fixed elements: oak floor, grey porcelain tiles, a green sofa, brass handles. Hold the card against those, never a white worktop.
- •5. Shortlist three, not thirty. Beyond three you stop comparing and start second-guessing.
- •6. Paint two full coats onto lining paper with a 30mm white margin, and let it cure. Emulsion darkens as it dries; a wet sample can be a full shade out.
- •7. Move the boards around: one by the window, one on the darkest wall, one against the skirting. Check at 8am, midday, 4pm and 9pm.
- •8. Check the bulbs. A 2700K warm-white LED pushes grey towards beige; 4000K makes it clinical. Lamps with a CRI below 80 flatten greens and reds.
- •9. Choose the woodwork white last. Brilliant white skirting against a soft off-white wall makes the wall look grubby.
Sheen is half the decision
The same colour in matt and in eggshell looks like two different products. Matt absorbs light and hides wavy plaster, which is why it suits older UK homes with patched or lath-and-plaster walls, but it marks and will not survive scrubbing. Mid-sheen bounces light — useful in a dark hallway, brutal on an uneven wall.
Our rule of thumb: matt on ceilings and bedrooms, washable matt in hallways, kitchens and children's rooms, eggshell or satinwood on woodwork, gloss only for the Victorian look. Paint sheens explained goes room by room, and for tight footprints, the best paint colours for small rooms is a useful shortlist.
Troubleshooting: when it still comes out wrong
Almost every complaint falls into one of these, and four of the five are fixable without a full repaint.
- •Looks cold when the card looked warm — north light. Shift to the next warmest chip in the family, or drop the bulbs to 2700K.
- •Patchy or striped after two coats — poor coverage over a strong old colour, or an unprimed filler patch flashing through. A separate primer cures it; see paint and primer in one vs separate primer.
- •Reads much darker than the tester — you judged it on a small board. Assume one to two shades deeper over 32m².
- •Every wall a slightly different tone — normal. Light falls unevenly. Matt evens it out; silk exaggerates it.
- •Colour fine, finish poor — cutting-in lines and roller stipple are technique, not colour. How to paint a room properly covers order of work.
The DIY-or-pro boundary: be honest about this bit
Choosing the colour is entirely a DIY job — no professional sees your evening light. But several jobs behind the colour are not DIY, and the line is clearer than most people think.
- •Do it yourself: testing colours, mist-coating new plaster, filling and sanding plasterboard, rolling walls and ceilings at head height, cutting in, and painting woodwork in water-based satinwood.
- •Get a professional: disturbing pre-1992 lead paint, any pre-2000 textured coating needing an asbestos survey, stairwells and double-height voids needing a tower rather than a ladder, spray finishing, and re-skimming walls past what filler can rescue.
- •Also call someone for recurring black mould, plaster that drums hollow when tapped, or sashes on a listed or conservation-area property where the paint type may be specified.
- •Worth paying for anyway: a whole-house scheme. A £200 consultation beats repainting three rooms, and a decorator will spot that your 'colour problem' is really 1990s silk emulsion.
Found this useful?
There's plenty more — hundreds of guides and honestly-tested product reviews for every corner of your home.
Browse All Guides