DIY & Maintenance · 6 min read · 16 June 2026
How to Paint a Room Like a Professional (Prep, Order & Cutting In)
Professional decorators spend more time preparing than painting — because the finish is decided before the lid comes off. The full sequence, honestly told.
By the Nims Casa editorial team — written from professional cleaning experience and checked against our editorial standards.
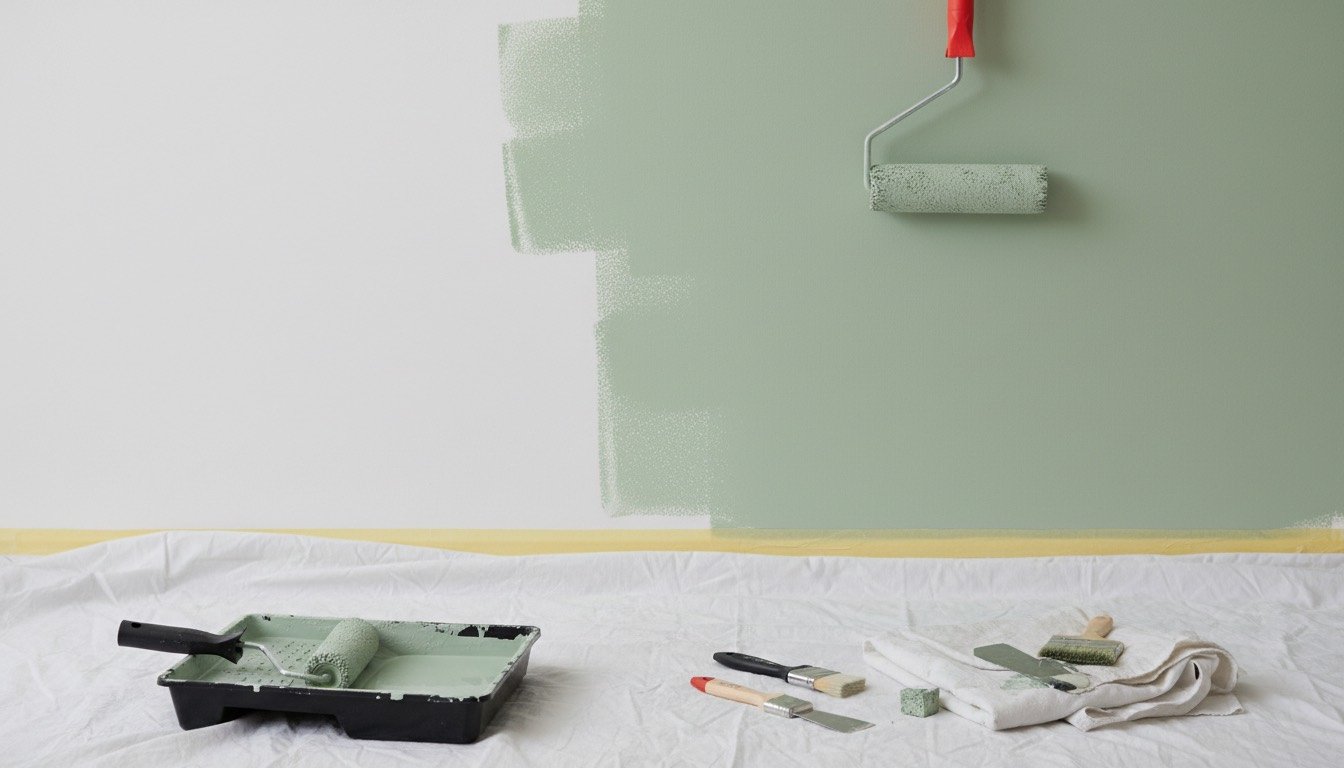
Watch a professional decorator at work and the odd thing is how little time they spend with a roller in hand. Ask one why and you'll hear the same answer every time: a proper finish is roughly seventy per cent preparation, twenty per cent sequence, and only ten per cent paint. Buy the priciest tin on the shelf and skip the first two, and it still won't save you from patchy coverage or a cut-in line that wobbles across the ceiling.
This guide covers the job as a decorator does it: getting the room properly ready, choosing a paint colour and finish first, painting in the right order so drips land on unfinished surfaces, cutting in without masking tape, and knowing how many coats a wall actually needs.
None of it is difficult, but it is slower than most people expect — and that's the real secret. A room painted properly over a long weekend still looks sharp in five years. A rushed Saturday job shows flash marks and dry cut-in ridges by the following spring.
Preparation: where a professional finish is actually won
Painting is the reward you get for doing the boring bit properly first. This is the stage most DIY jobs skimp on, and it's exactly why they don't look professional.
- •Clear the room and sheet it with cotton dust sheets, not plastic — plastic is slippery underfoot and tears the first time a stepladder catches it.
- •Wash every wall with sugar soap before filling or painting. Paint doesn't hide dirt or grease, it laminates it permanently under a coat you can see through in the wrong light.
- •Fill cracks, nail holes and dents, then sand smooth with a sanding block once dry — see filling cracks and holes in walls for damage beyond hairline cracks. Spot-prime every patch or it will 'flash' dull once the wall is dry.
- •Caulk every gap where woodwork meets wall. This one crisp line does more for a professional look than any other single detail.
- •Bare or freshly skimmed plaster needs a watered-down mist coat first, or it pulls moisture from your proper coats too fast and peels within a year or two.
- •Test colour swatches on two walls and check them morning and evening — UK daylight shifts a shade more than most people expect.
Tools and materials you actually need (and what they cost in 2026)
Skip the 'complete decorating set' from the multipack shelf. Five well-chosen pieces of kit outperform a twelve-piece bargain box for roughly the same spend.
- •Angled synthetic cutting-in brush (2 inch): £8–£16. One good brush beats three cheap ones — it holds an edge and doesn't shed bristles into wet paint.
- •Medium-pile microfibre roller sleeve: £4–£10 each, buy two or three. Cheap foam sleeves shed and 'orange-peel' the finish; a sleeve breaks down after one full room.
- •Roller pole or extension: £10–£22. It halves the effort and keeps a consistent angle on the wall, which matters more than most people realise.
- •Filler, sugar soap, caulk and a sanding block: roughly £15–£28 combined for an average room.
- •Emulsion paint: £25–£45 for a 2.5-litre tin, or £45–£75 for 5 litres from a mid-to-premium brand. Coverage varies between brands more than price suggests, so work it out properly with our paint coverage and cost guide before you buy.
- •Primer, or a paint-and-primer-in-one: worth it on bare plaster or a big colour change, but a sound wall in a similar shade rarely needs it — see paint and primer in one vs separate primer.
- •Low-tack tape, kept strictly for the carpet edge. Skip it on cut-in lines — it bleeds on textured plaster and lifts paint on removal.
The right order: ceiling, walls, then woodwork
Sequence matters: ceiling first, then walls, then woodwork, always top to bottom, so any drips land on a surface that isn't finished yet. A ceiling is its own small skill — uneven pressure shows up more on flat white overhead than anywhere else, which is why our dedicated painting a ceiling guide is worth a read first if you haven't done one before.
For each wall, cut in the edges first with a loaded angled brush — a steady hand beats masking tape once practised; move slowly and keep the stroke smooth. Roll the open wall before that cut-in edge dries, working in metre-wide vertical sections and finishing each with light, unloaded top-to-bottom passes to blend the join.
Gloss or satin woodwork needs a light sand and a wipe between coats — and it's worth knowing which sheen suits which surface before you buy, since eggshell and satin paint behave quite differently on skirting boards versus a feature wall.
How many coats you really need, and drying times that matter
Two coats on walls, always — 'one-coat' claims on tins rarely survive scrutiny in daylight and usually show roller marks or patchiness where the old colour bleeds through. Only recoat once the first coat is properly dry, not just touch-dry; rushing this drags half-cured paint straight off the wall.
Most water-based emulsions are touch-dry within one to two hours and safe to recoat after four to six, but full cure can take two to four weeks. Treat fresh walls gently during that window — bathrooms and older solid-wall houses slow every stage down.
Common mistakes that ruin an otherwise good paint job
Most disappointing paint jobs aren't down to bad paint — they're down to a handful of avoidable habits. Our full interior painting mistakes to avoid guide covers more, but these come up again and again.
- •Painting over a dirty or greasy wall without washing it first, sealing the marks in rather than covering them.
- •Rolling before the cut-in line is dry, creating a visible ridge or 'picture frame' effect around the edges.
- •Overloading the roller and dragging thick paint, or under-loading it and stretching a thin coat too far — both leave patchy coverage.
- •Recoating before the first coat has properly cured, which pulls paint off in streaks.
- •Skipping the mist coat on new plaster, which almost guarantees peeling or a blotchy sheen within a year or two.
- •Using masking tape on textured plaster and expecting a crisp line — it bleeds underneath and takes paint with it on removal.
When it's worth calling a professional decorator
A confident DIYer can paint most rooms to a genuinely good standard given a free weekend and patience for the prep. It's worth paying a decorator instead for high or awkward ceilings needing scaffold towers, damp or flaking paint that needs diagnosing first, period properties with lime plaster needing breathable products, or a household with no spare weekends. Our interior painting cost guide breaks down typical day rates and per-room prices across the UK.
Frequently asked questions
**How many coats of paint does a wall really need?** Two, in almost every case. A single coat rarely gives even coverage, and 'one-coat' claims assume ideal conditions most home walls don't meet, especially on a colour change.
**How long should I wait between coats?** Check the tin, but four to six hours is typical for water-based emulsion in a normally ventilated room; cooler or more humid rooms need longer.
**Do I need to prime new plaster before painting?** Yes — a watered-down mist coat, not full-strength paint. Fresh plaster is porous and pulls moisture from an undiluted first coat too quickly, causing patchy sheen and early peeling.
**Can I paint straight over wallpaper?** Only if it's fully sound and not textured or embossed. Anything lifting or heavily patterned should be stripped first, since paint telegraphs every seam and bubble straight through.
**What's the best time of year to paint a room indoors?** Any season works if the room is heated and ventilated, though spring and autumn are easiest — summer humidity slows drying in older homes, and winter condensation on cold walls can trap moisture under a fresh coat.
**Is own-brand paint worth buying over a premium brand?** It's usually £10–£20 cheaper per tin but often needs a third coat to match coverage, which can wipe out the saving on a colour change or heavily used room.
Found this useful?
There's plenty more — hundreds of guides and honestly-tested product reviews for every corner of your home.
Browse All Guides