Home Decor · 6 min read · 24 July 2026
How to Make a Small Room Look Bigger: A Decorator's Step-by-Step Method
Most small UK rooms are not as small as they feel. They are badly lit, badly proportioned and full of furniture bought for a different house. Here is the order a decorator fixes that in.
By the Nims Casa editorial team — written from professional cleaning experience and checked against our editorial standards.
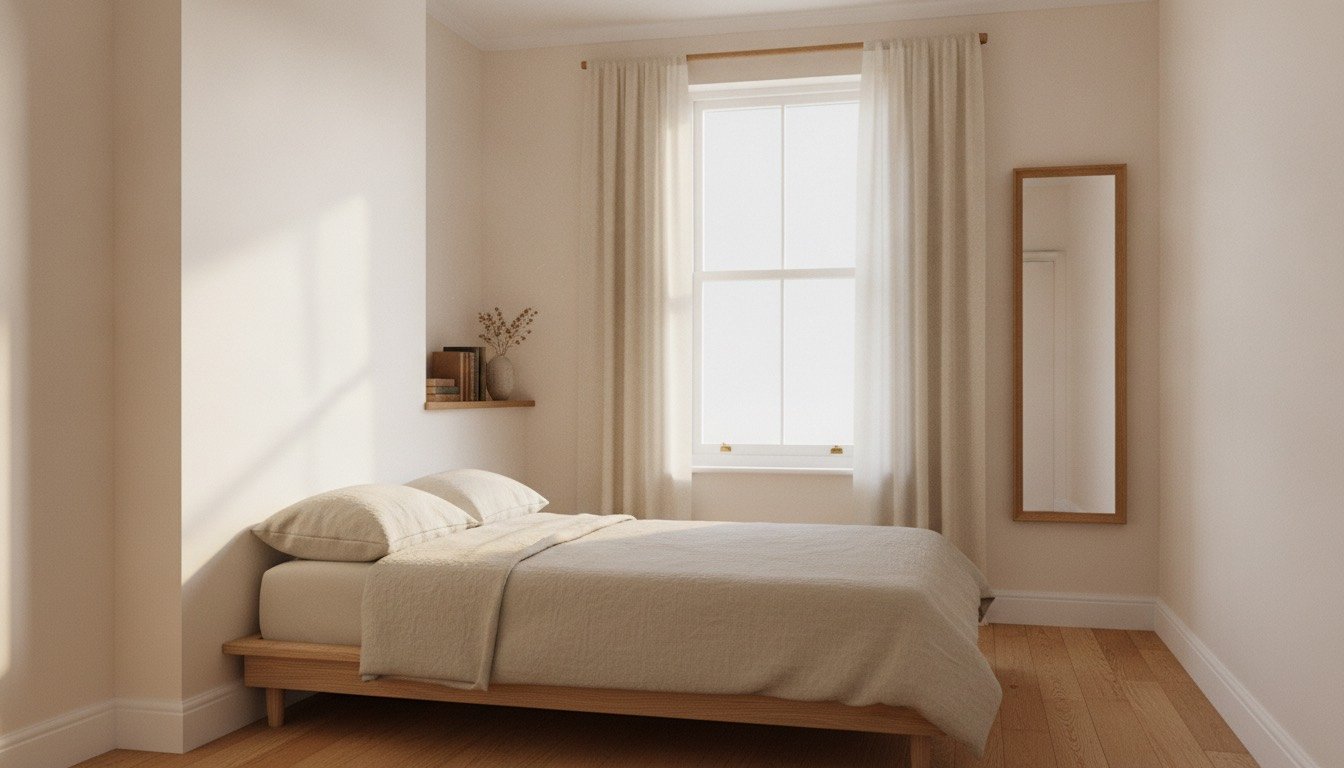
The box bedroom in a typical 1930s semi measures about 2.6m by 2.9m, roughly 7.5 square metres. That takes a double bed, a wardrobe and a chest of drawers without feeling like a cupboard, but only if the walls bounce light rather than soaking it up, and only if the eye has somewhere to travel. Get those wrong and even a 4m by 4m reception room reads as poky.
This is the sequence a decorator works in, and nearly all of it is within reach of a competent DIYer with a filling knife, a roller and a drill. The hard line is marked below: textured ceilings in pre-2000 houses, new lighting circuits and anything that moves a wall.
Safety First: Four Hazards Hiding in Small Rooms
Small rooms concentrate risk, and the surfaces you are most tempted to sand are the likeliest to be a problem.
- •Textured coatings (Artex and similar) applied before 2000 can contain chrysotile asbestos. Never sand or dry-scrape them: overboard with 9.5mm plasterboard, or have a plasterer skim over the top.
- •Paint on skirting and window frames in a pre-1992 house may be lead-based. Wet-sand with a damp abrasive or use a chemical stripper; no dry sanding, no heat gun.
- •Use a hop-up or step ladder, never a dining chair. On a 2.4m ceiling the last 300mm is where people overreach.
- •A 120 x 80cm framed mirror weighs 15-25kg. Plasterboard alone will not hold it: find the studs, usually at 400mm centres, or use heavy-duty metal hollow-wall anchors.
- •Before touching a light fitting, isolate at the consumer unit and prove it dead with a two-pole voltage tester. A neon screwdriver is not a test instrument.
Tools and Materials
That 7.5 square metre bedroom has roughly 26 square metres of wall, which one 5L tin covers twice over.
- •Filling knife, flexible filler and a decorator's caulk gun, around £20 the lot
- •Roller frame, medium-pile sleeves, 50mm cutting-in brush and dust sheets: £25-£40
- •5L matt emulsion at light reflectance value (LRV) 65 or above: £28-£45 trade, £60-£90 premium
- •1L water-based eggshell for skirting, architrave and door: £18-£28
- •Drill, masonry and wood bits, hollow-wall anchors, stud detector
- •A mirror at least 120cm tall, a curtain pole 50cm wider than the window, two 2700K lamps
Realistic Time and Cost
Allow a weekend: Saturday for clearing, filling and the first coat, Sunday for the second coat, woodwork and rehanging. A decorator charges £250-£450 for a small bedroom in the North and Midlands, £400-£650 in London and the South East, materials on top; our breakdown of interior painting costs shows how those day rates are built.
- •£120-£200: everything one shade, gaps caulked, 2700K bulbs, a mirror and full-length curtains
- •£300-£550: as above plus a 120 x 170cm rug, two lamps on a dimmer plug and floating shelves
- •£900-£2,500: bespoke alcove joinery, where custom built-in shelving costs start to bite
- •Skill level: confident beginner, if you can cut in a straight line and use a stud detector
The Method, Step by Step
The room comes out first: you cannot judge scale around a wardrobe you are about to move.
- •1. Empty the room completely and leave it bare for an hour to see where daylight actually falls.
- •2. Sketch the plan at 1:50, marking door swing, radiator and sockets. Walkways need 60cm minimum, 75cm to feel easy.
- •3. Fill every crack and screw hole, then caulk the skirting-to-wall gap using the method in filling cracks and holes in walls. Continuous lines read as one plane.
- •4. Choose colour by aspect. North-facing UK rooms get cool blue-grey light, so pick warm off-whites with a yellow or red base.
- •5. Check the LRV: below roughly 50, a north-facing room goes grey by four in the afternoon. The best paint colours for small rooms are almost all 65 and above.
- •6. Ceiling, then walls, then woodwork, two coats throughout. Put the wall colour on skirting, architrave and door in eggshell. Losing that horizontal white band is the biggest single gain here.
- •7. Run flooring in one unbroken material along the longest sightline. Changing covering at the door halves perceived depth.
- •8. Size the rug up: a 120 x 170cm rug with the front legs of the sofa or bed on it anchors the space.
- •9. Hang the curtain pole 15-20cm above the reveal and 25cm past each side, full length to the floor, so curtains clear the glass.
- •10. Fix the mirror at 90 degrees to the window, not opposite it: that spreads daylight sideways instead of reflecting a bright rectangle of sky.
- •11. Build three light layers at three heights, all 2700K and dimmable, following how to layer lighting in a room. A lone central pendant flattens a room more than any paint colour.
- •12. Bring furniture back on legs: 15cm of visible floor beneath lets the eye read the full area. Pull pieces 5cm off the wall.
- •13. Edit hard. One large picture beats six small ones; if that is the sticking point, work through decluttering room by room first.
Troubleshooting: Finished, and Still Poky
- •Dark by 4pm: bulbs under 470 lumens. Move to 2700K at 806 lumens and add a second source, not a brighter one.
- •Walls look grubby rather than light: matt scuffs in a narrow room. Switch to wipeable matt on the lower half.
- •Still cluttered after clearing: too many horizontal surfaces. Consolidate onto one shelf run and clear the windowsill.
- •You squeeze past the furniture: you have a 45cm walkway. Rotate the largest piece 90 degrees, using how to arrange furniture in a small living room.
- •Pale but cold: add texture, not colour. Linen, wool and bare timber warm a scheme without dropping reflectance.
Where DIY Stops and a Professional Starts
A competent DIYer can do all of this without notifying anyone: fill, caulk, paint, hang mirrors and shelves, fit poles, swap a pendant or light switch like-for-like on an existing circuit, lay floating floor. That is roughly 90 percent of the visual gain. Everything below needs a registered trade and, in England and Wales, usually Building Regulations sign-off. Scotland works to its own standards.
- •New lighting circuits, new sockets, wall lights needing fresh cable, and any electrical work in a bathroom: notifiable under Part P, so use an electrician on a competent person scheme such as NICEIC or NAPIT
- •Removing a wall or chimney breast: structural engineer's calculations plus Building Control approval. Gallows brackets alone are no longer routinely accepted
- •Enlarging or replacing a window: a FENSA or Certass registered installer, or a Building Control application
- •Removing suspected asbestos textured coating rather than covering it: HSE-licensed contractor only
- •Skimming a full ceiling: DIY-able in theory, but a plasterer does 12 square metres in half a day for £180-£280, and it will be flat, which matters when light rakes across it
Keeping the Effect
Every mark sits at eye level in a small pale room. Keep a 250ml touch-up pot dated on the lid, and clean the window glass twice a year: dirty north-facing glass costs a surprising amount of usable daylight. The rest is permanent; clearing the flat surfaces weekly does the rest.
Found this useful?
There's plenty more — hundreds of guides and honestly-tested product reviews for every corner of your home.
Browse All Guides