DIY & Maintenance · 6 min read · 25 June 2026
How to Fill Cracks & Holes in Walls (Invisible Repairs, First Time)
The gap between a visible patch and an invisible repair is technique, not talent: slightly proud, properly sanded, primed and blended. The full method.
By the Nims Casa editorial team — written from professional cleaning experience and checked against our editorial standards.
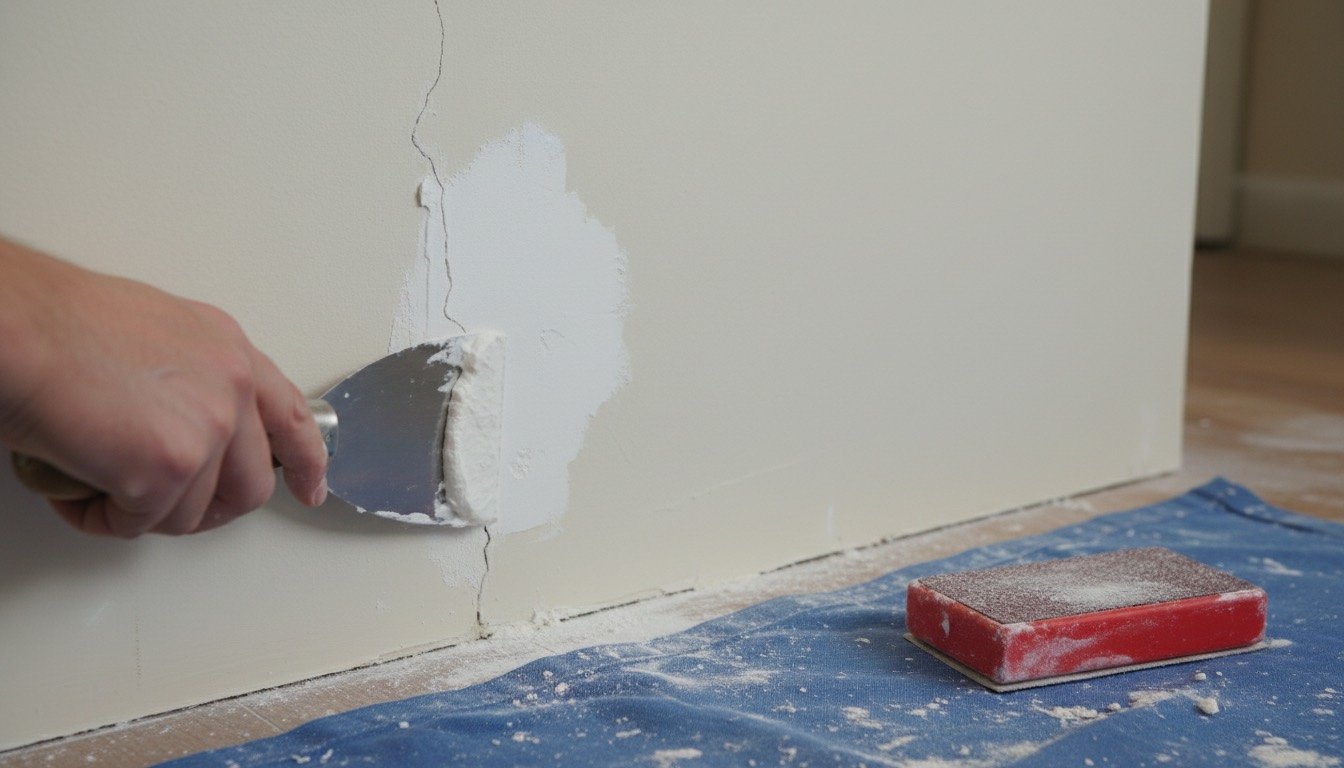
Every home accumulates wall wounds — picture-hook holes, hairline settlement cracks over doorways, the doorknob crater behind a bedroom door, the shelf bracket that moved before you got the spacing right. Filling them is easy. Filling them so nobody spots the repair under a lamp three months later is a five-step discipline most people skip half of, which is why so many British walls wear proud grey badges of past patches, visible the moment light hits them sideways.
This guide covers which filler suits which type of damage, the tools worth buying and what they cost in 2026, the method that turns a patch into an invisible repair, the mistakes that give one away, and the point where filler stops being the right answer and a crack needs a proper diagnosis instead.
None of it requires a plasterer's skill — just patience at the drying stage and resisting the urge to paint the moment filler looks dry to the touch.
Match the Filler to the Damage
Using the wrong filler is the single biggest reason DIY repairs stay visible from across the room: a soft ready-mixed filler crumbles under a skirting board within a year, while a two-part filler is overkill for one picture-hook hole. If the UK and US terms have you second-guessing what's in the tub, filler vs jointing compound, explained clears it up. Match the product to the wound first.
- •Hairline cracks and pinholes: ready-mixed fine surface filler, £4–£7 a tub — smooth, sandable, no mixing.
- •Screw holes and chips to ~10mm: multi-purpose ready-mixed or powder filler, £3–£10; powder dries harder and shrinks less.
- •Deep or wide damage past 20mm: build up in layers with a deep-gap or two-part filler as the base — one thick blob skins over, then shrinks and cracks later.
- •Recurring cracks at door frames or plasterboard joints: flexible caulk-type filler or jointing tape under standard filler — rigid filler in a moving joint just re-cracks.
- •Corners and external edges: two-part hard filler and a straight-edged knife; soft fillers crumble on impact.
Tools and Materials You'll Need (and What They Cost)
A basic kit covers most domestic repairs for years, since tubs reseal and blades don't wear out.
- •Filling knife set, 25mm/50mm/100mm blades: £6–£15
- •Fine surface or multi-purpose filler: £4–£10 a tub
- •Powder filler for larger repairs: £5–£12 a bag
- •Sanding block and 180–240 grit paper: £3–£8
- •Dust sheet and low-tack masking tape: £5–£10
- •Watered-down emulsion or a wall primer/sealer: £8–£18 a litre
- •Jointing tape for recurring cracks: £3–£6 a roll
- •Typical reusable repair kit: £25–£60 total
The Five-Step Method for an Invisible Repair
With the right filler to hand, the gap between a patch you can spot and one nobody notices comes down to five steps people usually rush.
- •Prep the wound. Rake out loose material with a filling knife or old screwdriver, widen hairline cracks slightly so filler can key in, brush out dust, then dampen the area with a wet brush so the wall doesn't drink the filler's moisture before it cures.
- •Overfill by a millimetre. Press filler in firmly from more than one direction to avoid trapping air, leaving it slightly proud. Filler shrinks as it dries — a dip means a second coat, a bump just needs sanding.
- •Let it cure fully before sanding. Ready-mixed filler is often ready in one to four hours; deeper fills take longer. Sanding too soon drags the filler instead of cutting it cleanly.
- •Sand flush and feather the edges. Fine 180–240 grit paper on a block, blending into the wall rather than stopping abruptly. Close your eyes and run a hand over it — fingertips find lumps eyes miss.
- •Prime before painting. Bare filler is more porous than painted plaster and drinks paint unevenly, leaving a flat 'flash' mark under the topcoat forever. A coat of diluted emulsion or a wall primer/sealer solves this.
- •Paint beyond the patch. Blend with a soft-edged roller pass, ideally corner to corner, because a paint dab shaped like the hole is just a painted hole. On textured walls, press a damp sponge onto the drying filler first to mimic the texture.
Plaster Walls vs Plasterboard: What Changes
The method above works on both, but the failure modes differ — check drywall vs plaster walls in the UK if you're unsure which is behind your paint. Solid plaster on brick or old lath is denser and cracks in response to real building movement rather than just temperature swings, so repairs that keep failing are worth investigating with fixing cracks in plaster walls.
Plasterboard cracks along joints are usually a taping issue, and filler alone over a joint tends to fail again without tape underneath. For anything larger than a fist-sized hole, filler isn't the right tool at all — see how to repair a large hole in drywall for patching with board and scrim tape.
Common Mistakes That Leave a Visible Patch
- •Skipping primer and painting straight onto bare filler — the most common cause of a patch that 'flashes' under certain light for years.
- •Painting only the shape of the repair instead of blending outward, producing a very neatly painted hole rather than an invisible one.
- •Sanding before the filler has fully cured, leaving a rough surface instead of a clean feathered edge.
- •Treating a moving joint as a one-off filler job rather than fitting jointing tape; if a crack keeps returning, find out why drywall cracks keep coming back before filling it a third time.
- •Using a filling knife narrower than the repair, which makes it harder to press filler in evenly and leaves a proud ridge.
When to Call a Professional Instead of Filling It Yourself
Most wall damage is entirely cosmetic and DIY-friendly. But cracks wider than about 3mm, diagonal or stair-step cracks in brickwork, cracks running through a frame, or a crack that reopens after two filling attempts mean filler is treating a symptom — when to call a structural engineer explains the crack widths and signs that matter.
If the damage covers more than a few patches — a whole wall of cracked plaster, several large holes, crumbling board — it's often cheaper to bring in a plasterer than fight it yourself all weekend. How much drywall repair costs in the UK gives realistic 2026 price ranges to weigh against your own time.
Frequently asked questions
**How long does wall filler take to dry before I can paint it?** Ready-mixed fine surface filler is usually paintable in one to four hours for shallow fills, but deeper repairs with powder or two-part filler can need a full day to cure before sanding and priming — painting too soon causes the flash-marking primer is meant to prevent.
**Can I use the same filler on both plaster and plasterboard walls?** Multi-purpose ready-mixed filler works on both for small jobs, but plasterboard joints benefit from jointing tape, and plaster with genuine movement needs the crack investigated rather than just filled.
**Why does my filled crack keep reappearing in the same spot?** Almost always because the crack is still moving — a door frame flexing, or a plasterboard joint without tape — and rigid filler can't stretch with it. Flexible filler or jointing tape underneath solves most recurring cracks.
**Do I need to prime filler before painting, even with a paint-and-primer-in-one product?** Yes. Combined products are formulated for previously painted, sealed surfaces, not bare, porous filler — see paint-and-primer-in-one vs separate primer for why fresh filler still needs its own seal coat.
**What's the actual difference between filler and caulk?** Filler is rigid once cured, for static gaps like holes and hairline cracks; caulk stays flexible, for joints that move slightly, such as where a frame meets a wall. Using rigid filler in a flexible joint is why a 'fixed' crack often reopens within weeks.
Found this useful?
There's plenty more — hundreds of guides and honestly-tested product reviews for every corner of your home.
Browse All Guides