Roofing & Exterior · 6 min read · 13 June 2026
How to Build a Deck: The UK Step-by-Step Guide to Ground-Level Decking
A ground-level garden deck is genuinely within reach of a careful amateur. What separates one that lasts twenty years from one that goes soft in five all happens before the first board goes down.
By the Nims Casa editorial team — written from professional cleaning experience and checked against our editorial standards.
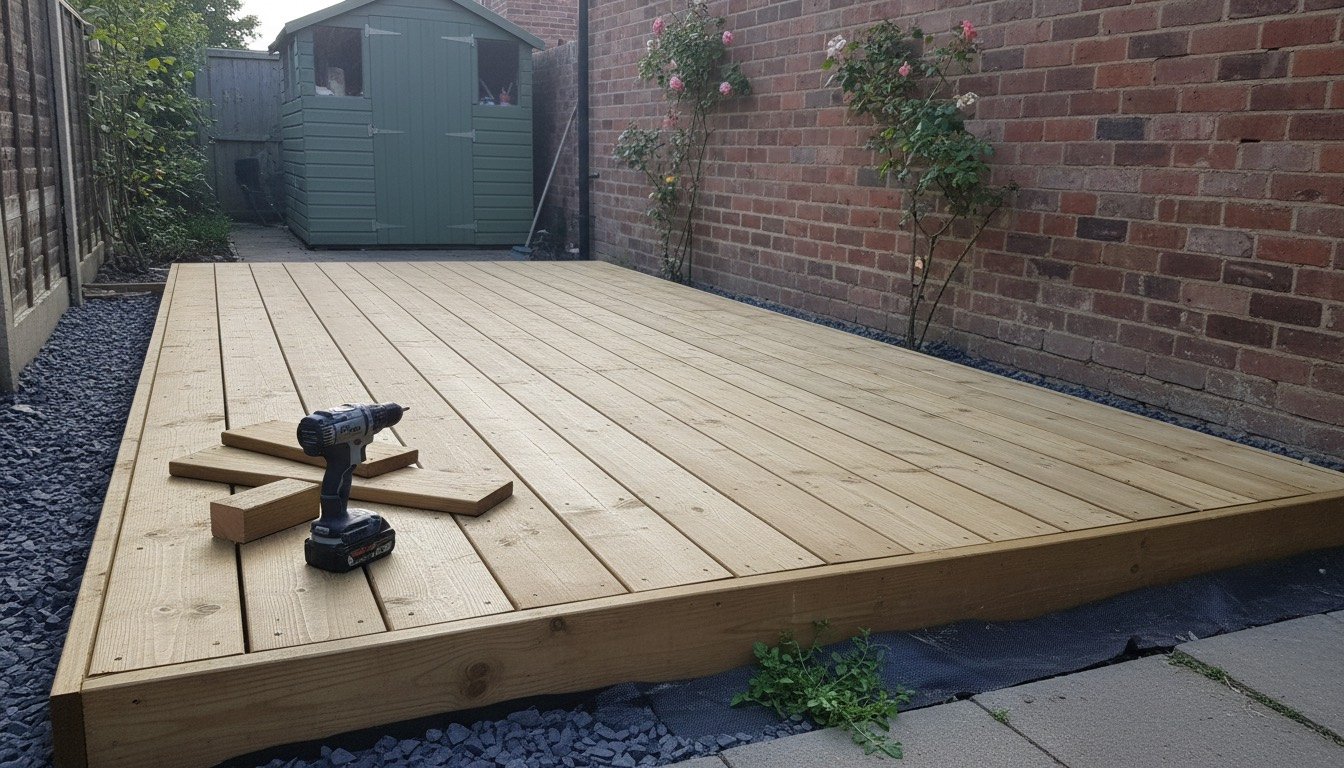
Decking is one of the few garden projects where a patient amateur gets a landscaper's result. The joinery is blunt, the tolerances forgiving, and nothing you cut carries the house. What separates a deck that lasts twenty years from one that goes spongy in five is settled before the first board: ground preparation, airflow underneath, and where the timber sits relative to the damp-proof course.
This is a freestanding, ground-level build up to about 300mm high — what most UK gardens want, and what stays inside permitted development. Raised and attached decks are a different job; we mark that line below.
Safety and the checks that come before the spade
Two things ruin British decks — damp and buried services — and both are decided in the first hour. The finished deck must sit at least 150mm below the damp-proof course, the thicker mortar line two brick courses above ground. Build over it and you have bridged water into the wall; we have lifted three-year-old decks off walls already salting inside.
Decking under 300mm high covering less than half the garden is usually permitted development, but conservation areas, listed buildings and flats change that — check when you need planning permission first.
- •Sweep trench lines with a cable detector and hand-dig within a metre of the house.
- •Never board over an inspection chamber — frame a lift-out hatch instead.
- •Do not choke airbricks or gullies along the wall.
- •FFP3 mask, goggles and gloves for cutting treated timber; the dust is a genuine irritant.
Tools and materials for a 4m x 3m deck
Twelve square metres is the sweet spot: a table and chairs fit, and it finishes in two weekends. This assumes 47 x 100mm C16 treated joists at 400mm centres on paving-slab pads — drop to 300mm centres for composite or diagonal boards, and read our ten-year comparison of composite versus wood decking first.
- •Cutting and setting out: circular saw, combi drill, impact driver, 3mm pilot bit, 8m tape, string line, 1.8m level, long straight edge.
- •Groundwork: spade, mattock, wheelbarrow, club hammer, plate compactor hire at £40-£60 a day.
- •Frame: eleven 3m lengths of 47 x 100mm C16 treated softwood, 47 x 150mm perimeter, galvanised joist hangers.
- •Boards: twenty-four 4m lengths of 120 x 28mm treated decking, ordered 10% over.
- •Base and consumables: fifteen 450mm slabs, half a tonne of MOT Type 1, sharp sand, weed membrane, 500 stainless decking screws, butyl joist tape, end-grain preserver, slate shims.
Realistic time and cost
For 12m² in treated softwood at 2026 prices, budget £620-£900 in materials: £400-£540 of timber, £90-£140 of slabs and aggregate, £90-£130 of fixings and preserver. Composite boards on the same frame add £700-£1,200, and a landscaper charges £120-£190 per square metre in softwood or £220-£320 in composite — more detail in our UK cost guide to building a deck.
Allow 6-8 hours for groundwork, 4-6 for the frame, 6-8 for boards and 3 for trims: two decent weekends. Add a day if the ground falls more than 200mm across the site.
The build, step by step
Work in this order; rushing the pads means fighting a frame that will not sit flat.
- •1. Set out with string lines, matching both diagonals within 5mm, then strip 100-150mm of turf and lay weed membrane.
- •2. Mark three rows of pads running away from the house, maximum 1.5m apart, one under every joist line.
- •3. Dig each pad 200mm deep, compact 100mm of MOT Type 1 and bed a 450mm slab on sharp sand. Level within 3mm, then set a 1:100 fall away from the house.
- •4. Build the 47 x 150mm perimeter frame with two 6 x 120mm structural screws per corner, re-check the diagonals, then hang inner joists at 400mm centres in galvanised hangers.
- •5. Sit the frame on plastic shims at every bearing point, packed with slate — never timber offcuts, which rot and let it rock.
- •6. Tape every joist top edge with butyl and brush end-grain preserver on every cut; factory treatment penetrates only a few millimetres.
- •7. Lay the first board 10mm off the wall; space the rest 5-6mm for kiln-dried timber, 3-4mm for wet timber, which will shrink.
- •8. Two screws per joist, 20mm in from each edge, pilot-drilled within 50mm of a board end to stop splits.
- •9. Trim the overhang in one pass along a clamped straight edge — see using a circular saw accurately — then treat the cut.
- •10. Fit a vented fascia skirt backed with stainless mesh, gravel the perimeter, and leave new timber 8-12 weeks before oiling.
The renter-safe version you can lift out in an afternoon
If you rent, none of the above needs to happen. Interlocking deck tiles — 300 x 300mm on click-together plastic bases — cost £22-£45 per square metre in acacia and £45-£70 in composite. Twelve square metres takes two to three hours to lay, under an hour to lift, and stacks flat when you move. They need an existing patio or concrete base; on grass they sink and rot within a year.
For larger areas, a freestanding frame on adjustable pedestals over existing paving does the same job, with nothing screwed into wall or fence. Protect the deposit: photograph the paving first, get written landlord permission, and never fix to the boundary fence. Lift the tiles each spring and autumn to sweep out silt, or you hand back stained slabs — recoverable with our patio cleaning method, but easier avoided.
Troubleshooting the five faults we get called back to
Nearly every complaint about a self-built deck is one of these; four need no boards lifted.
- •Bouncy underfoot: joist centres too wide, or pad rows over 1.5m apart. Add a mid-span row of pads or solid noggins.
- •Boards cupping upwards: trapped damp from a solid skirt or gravel piled against the frame. Open the airflow and most relax over a summer.
- •Screws standing proud at three months: wet timber shrinking. Re-drive at 6-8 weeks rather than over-tightening on day one.
- •Green slime by the first winter: normal on a shaded deck. Stiff brush and an oxygenated cleaner, not neat bleach or a close-held lance, which furs the grain — see cleaning and reviving wooden decking.
- •Standing puddles: no fall was set, or a joist has dished. Shim that bearing point and re-check with a straight edge.
When to stop and call a professional
Ground-level decking is DIY; raised decking is structural work. Once any part of the surface sits more than 600mm above the ground beside it, Approved Document K expects guarding — an 1100mm barrier with no gap a 100mm sphere can pass. That is not a snagging item; it is how people fall. Expect £3,000-£6,000 for a 12m² raised deck with balustrade and steps. Hand it over if any of these apply.
- •Any part finishing more than 600mm above ground, or needing steps and a balustrade.
- •A ledger board fixed into the house wall, where poor detailing bridges the cavity and DPC.
- •Sloping sites needing posts concreted deeper than 600mm, or anything retaining soil.
- •Decking over a drain run or inside a mature tree's root zone.
- •Anything above 300mm high, covering more than half the garden, or on a flat or listed building.
Found this useful?
There's plenty more — hundreds of guides and honestly-tested product reviews for every corner of your home.
Browse All Guides