DIY & Maintenance · 6 min read · 21 June 2026
How to Build a Wheelchair Ramp: UK Gradients, Costs and Step-by-Step Build
Most ramps fail on arithmetic, not carpentry. Measure the rise, find the run, work out which ramp the property actually needs — then build it properly.
By the Nims Casa editorial team — written from professional cleaning experience and checked against our editorial standards.
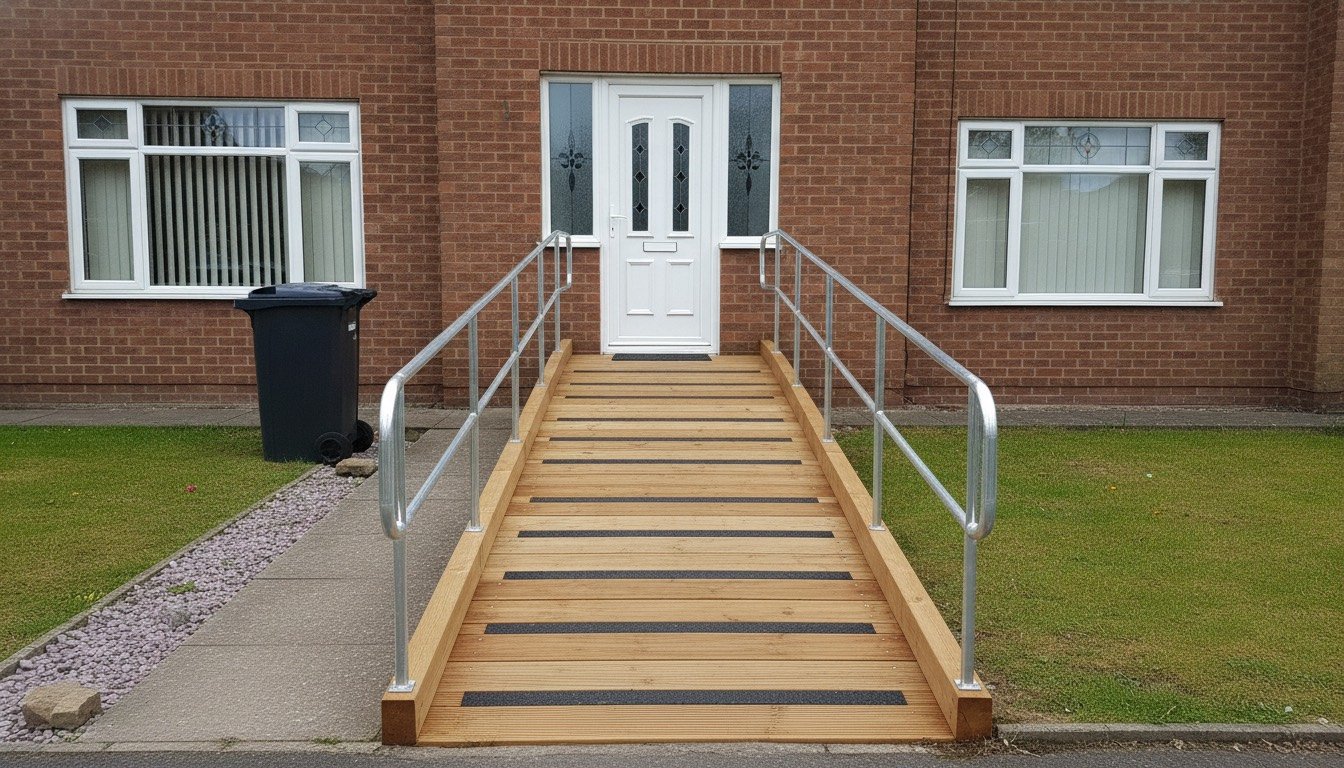
Most unusable ramps were doomed before anyone picked up a saw. Someone measures a 400mm step, buys three metres of timber, then finds on fitting day that the run needed to be eight. The carpentry is easy; the arithmetic decides whether you get independence or a slope nobody trusts.
So work out which problem you have first. A 30mm door sill, a 150mm doorstep and a 600mm rise to a Victorian front door are three different jobs, and only one is a weekend build.
Step 1: diagnose which ramp you actually need
Take two measurements. For the rise, rest a long spirit level on the door threshold, hold it dead level over the step and measure straight down to the ground at the far end. For the run, measure the clear straight-line distance from the bottom of the step, staying off drains, manhole covers and the neighbour's boundary. Then read across.
- •Rise under 150mm onto firm ground: a rubber threshold wedge (£25–£90) or a short modular aluminium unit (£90–£280). Not a building project.
- •Rise 150–450mm with 6m or more of clear run: a fixed timber ramp — the rest of this guide.
- •Rise 150–450mm with under 4m of run: no compliant straight ramp fits. Switchback with a mid-landing, regrade the path, or buy a modular system with a platform.
- •Rise over 600mm, or bridging a lightwell or bank: stop, that is a designed structure.
- •User self-propels a manual chair: design to 1:20, not the legal maximum. That gap is the difference between going out alone and needing a push.
- •Powerchair or scooter, often 130–180kg with occupant: stiffer joists and closer post centres.
- •Renting or housing association stock: get written consent first — many landlords part-fund the work.
The numbers that make a ramp safe and legal
Approved Document M sets the gradients, and they are stricter than people expect: a steeper ramp is only allowed over a shorter flight, because what defeats a chair user is how long they fight the slope. A ramp is usually permitted development, but a listed building or conservation-area frontage needs consent — see planning permission and building regulations.
- •1:20 — maximum 10m flight, 500mm rise. The target for independent manual users.
- •1:15 — maximum 5m flight, 333mm rise. A fair compromise on a tight plot.
- •1:12 — maximum 2m flight, 166mm rise. Short hops only, and hard to self-propel.
- •900mm minimum clear width between kerbs or rails; 1000mm is better for a powerchair.
- •Level landings 1200mm long top and bottom, clear of the door swing; 1500mm square where the ramp turns.
- •Handrails both sides where the rise exceeds 300mm, at 850–1000mm high, extending 300mm past each end.
- •No more than a 15mm upstand at the threshold, chamfered or pencil-rounded.
Tools, materials and skill level
This is intermediate carpentry. If you have built a shed base or a deck you will cope; if not, the framing logic in our step-by-step deck build transfers directly, and most cuts use the technique in how to use a circular saw.
- •Tools: cordless drill/driver, circular saw, 1.8m spirit level, string line, spade, 13mm socket, PPE.
- •Structure: 100x100mm treated posts, 47x150mm C24 joists at 400mm centres (300mm for powerchairs), noggins, joist hangers.
- •Fixings: M10 galvanised coach bolts, 5 x 80mm decking screws — stainless or hot-dip galvanised only, as plain zinc rusts out of treated timber inside three winters.
- •Deck: smooth-faced treated boards laid across the direction of travel, plus resin anti-slip inserts. Grooved boards run the wrong way for castors.
- •Base: postcrete for 300 x 300 x 400mm pads, and end-grain preservative.
Realistic time and cost in 2026
A straight 6m ramp for a 300mm rise takes a confident pair 12–16 working hours, spread over a weekend since post concrete wants 24–48 hours before you load it. Materials run £480–£750, roughly £75–£110 per linear metre for a 1m-wide ramp with kerbs; galvanised handrail adds £45–£90 per metre. A joiner charges £1,300–£2,600; a modular aluminium system fitted is £1,200–£3,500 but lifts away cleanly when it is no longer needed.
Building a timber ramp, step by step
Work top-down: the landing height is fixed by the threshold, and everything else is set from it.
- •1. Set the top landing so its finished deck sits 15mm below the door threshold and runs at least 1200mm out from the door face. Mark that line on the wall.
- •2. Run a string line from that level to the ground at your chosen gradient. Where it meets the path is the toe — if that lands in a border or on the pavement, redesign now.
- •3. Dig post holes 400mm deep at 1.2m centres down both sides, plus four for the landing, and set the posts plumb.
- •4. Bolt bearers to the posts with M10 coach bolts, top edges on the string line. Never put the load path through screws into end grain.
- •5. Hang joists at 400mm centres and fit noggins at mid-span, then bounce-test every bay — flex you can feel now becomes a wobble that frightens a chair user later.
- •6. Lay boards across the ramp, two screws per joist, gaps under 6mm, with a 1:40 cross-fall so water sheds sideways.
- •7. Fix 100mm kerb upstands to both open edges, then handrails at 900mm, bolted through the posts rather than the deck.
- •8. Seal every sawn end, fit grit strips at 300mm intervals, taper the bottom board so there is no lip, then test it with a loaded chair.
Troubleshooting the usual problems
These cover nearly every complaint about a home-built ramp.
- •Springy underfoot: joist centres too wide or spans too long. Add an intermediate bearer and post, or noggins at 600mm.
- •Slippery from October: that green film is algae, the biggest injury risk on timber. Clean it twice a year using our decking cleaning method and add grit strips.
- •Castors catching: gaps over 6mm, or grooved boards running downhill. Overlay with smooth boards.
- •Water pooling at the toe: no cross-fall. Cut a shallow gravel channel across the base.
- •Simply too steep: the only honest fix is more run — a switchback with a 1500mm landing, or a step lift instead.
When to call a professional, and who pays
Stop if the rise is over 600mm, if the ramp crosses a lightwell or retaining structure, if it forms part of an escape route, or if the building is listed. Stop too if the honest answer is not a ramp: with no room for a 1:15 run, a step lift serves better, and a ramp built at 1:8 to fit the plot is worse than nothing.
Money is more available than people assume. A Disabled Facilities Grant covers up to £30,000 in England, £36,000 in Wales and £25,000 in Northern Ireland, with Scotland handled through the local Scheme of Assistance — means-tested for adults, not children. Ask for an occupational therapist assessment first; they measure the chair and the user, not just the step. Access work for a disabled person is also zero-rated for VAT. And treat the ramp as one part of a plan: read aging in place home modifications alongside it, because a front door someone can reach is little use if the bathroom still is not.
Found this useful?
There's plenty more — hundreds of guides and honestly-tested product reviews for every corner of your home.
Browse All Guides