DIY & Maintenance · 5 min read · 8 July 2026
How to Install an EV Charger at Home: UK Costs, Steps and the DIY Limit
Most of a home EV charger install is planning, not wiring — and the wiring is the one part UK law says isn't yours to do. Here's the honest split, with real 2026 costs and the stop signs.
By the Nims Casa editorial team — written from professional cleaning experience and checked against our editorial standards.
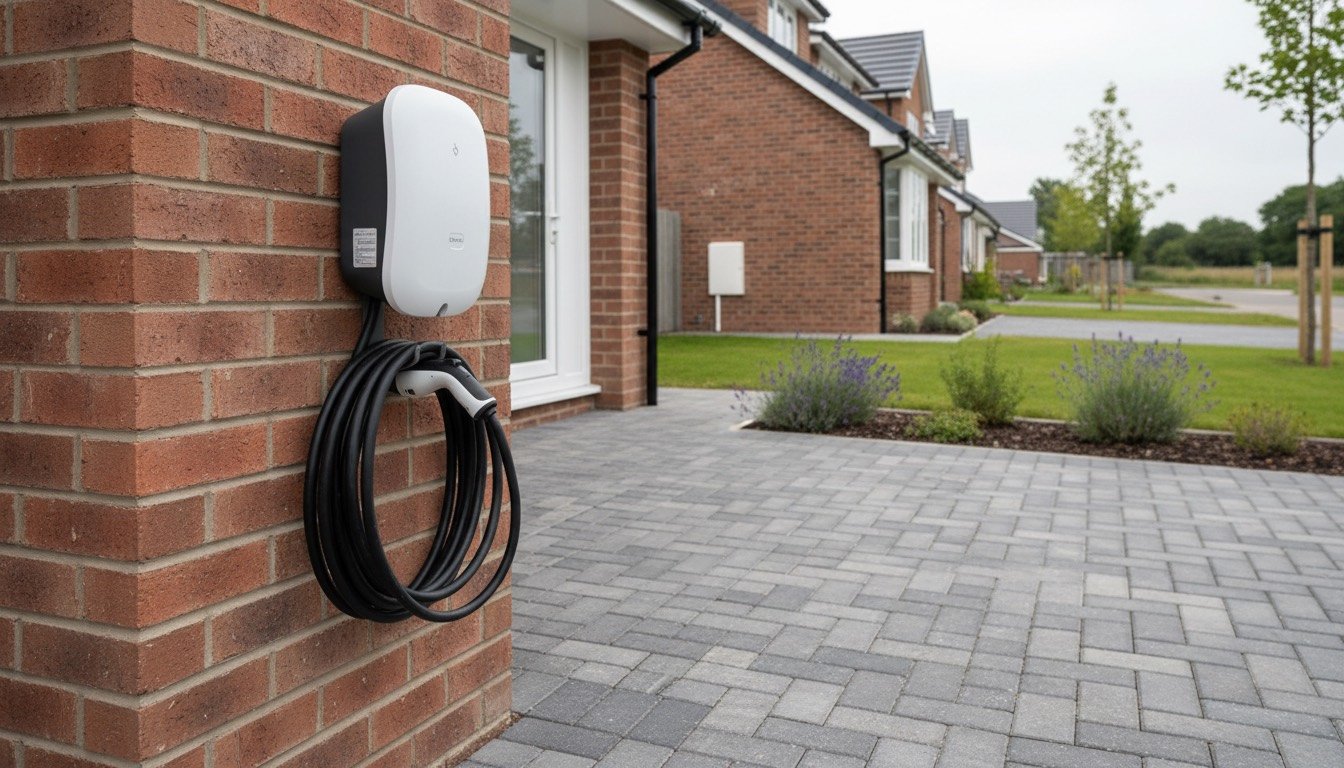
We spend our working days in other people's garages and utility rooms, and lately the same white box keeps appearing on wall after wall: the 7kW home EV charger. We've seen tidy installs and some genuine shockers. So here is the honest professional's answer to how to install an EV charger at home in the UK — what you can genuinely do yourself, what the law reserves for a qualified electrician, and how to tell a good £900 job from a bad one.
The short version: the final connection is notifiable work under Part P of the Building Regulations, and every charge point sold here must meet the Smart Charge Points Regulations 2021. This is a plan-it-yourself project, not a wire-it-yourself one. But the planning matters — done properly, it can shave £100–£200 off your quote and a fortnight off the wait.
The Job at a Glance
The numbers we'd want if it were our own house:
- •Skill level: DIY for the survey prep, siting and wall clearance; a qualified electrician (ideally on an approved installer scheme) for the connection
- •Time: 3–5 hours on install day; allow 1–2 weeks for quotes, survey and paperwork
- •Cost: £800–£1,200 fully installed for a 7kW unit, of which the charger itself is £450–£950
- •Extras: £30–£60 per metre for cable runs beyond the first 5–10m included; £150–£300 for consumer unit work; £0–£120 for a main fuse upgrade
- •Rules involved: BS 7671 Section 722, Part P notification, the Smart Charge Points Regulations 2021, and a notification to your Distribution Network Operator (DNO)
Steps 1–3: Find Out What Your Supply Can Take
A 7kW charger draws 32 amps continuously for hours — a heavier sustained load than anything else in your house. You can answer the installer's first question, whether your supply can take it, before anyone visits.
- •1. Photograph your main cut-out fuse — the sealed black or grey unit where the meter tails begin, usually marked 60, 80 or 100. 80A or 100A is fine. On 60A, a charger running alongside an electric shower can blow the fuse, so you'll need a DNO fuse upgrade (free to about £120) or a charger with load management that throttles itself.
- •2. Check for a looped supply. If two thick cables enter your cut-out, you may share a service cable with next door — common on 1930s–1970s estates. The DNO must unloop it first; usually free, but it adds two to six weeks, so find out now.
- •3. Open your consumer unit and count the spare ways. A modern board with a free slot keeps the price down; an old rewireable fuse box means board work before any reputable firm will connect a charger. Note where the board sits too — cable distance from board to charger is what really sets the price.
Steps 4–6: Choose the Unit and the Spot
This is the part homeowners rush, then regret.
- •4. Pick tethered or untethered. Tethered (cable permanently attached, usually 5m or 7.5m) is our pick for daily use — nobody enjoys dragging a wet cable out of the boot in January. Untethered looks tidier and accepts any cable, but budget £100–£150 for that cable separately.
- •5. Site the unit within reach of your charge port with the car parked normally. Measure with the actual car on the drive: charge ports sit on different corners of different cars, and a 5m cable disappears fast once routed around a bumper.
- •6. Check connectivity at that exact spot. Smart functionality is a legal requirement, so the unit needs Wi-Fi or 4G where it hangs — stand at the wall and run a speed test on your phone. Then clear a metre of wall and floor; if the charger is going inside, our garage and shed storage guide will reclaim the space in a weekend.
Steps 7–9: The Electrician's Part (and What Good Looks Like)
From here, hands off. Get three quotes from installers who ask for your photos or do a proper survey — anyone offering a fixed price without seeing your cut-out is guessing.
- •7. Survey and paperwork. A good installer checks your earthing arrangement, notifies the DNO, and handles the Part P side. If a quote leaves the notifications to you, walk away.
- •8. Install day. Expect 3–5 hours: power isolated, a dedicated circuit run in 6mm² or 10mm² cable, its own RCBO protection in the board, and the charger's built-in PEN-fault protection doing the earthing work — the days of digging an earth rod into your lawn are mostly behind us.
- •9. Commissioning and certificates. Before the van leaves, watch the charger tested at full rate and get the Electrical Installation Certificate on the day, with the Building Regulations compliance certificate following within about 30 days. No certificate, no final payment — we mean that.
When to Stop
Hard limits, learned from other people's expensive lessons:
- •Never make the final connection yourself, however handy you are. It's notifiable work, it voids the charger's warranty, and it can invalidate your home insurance.
- •Never run a three-pin 'granny cable' permanently through an extension lead or a cracked-open window. They're for occasional use in a healthy socket only — and if the garage socket you planned to use is dead, work through our dead socket troubleshooting guide before trusting it with 10 amps for eight hours.
- •Stop and call your DNO if the cut-out is damaged, has no visible rating, or its seals are broken — that's their kit, not yours.
- •Stop if any installer says 'no need to notify anyone'. That's the sound of a job you will later pay someone else to redo.
Running It: Cheap Miles and Five-Minute Maintenance
The payoff is real. On a dedicated EV tariff charging overnight at around 7p per kWh, a 60kWh battery fills for roughly £4.20 — about 2p a mile against 15–20p in a comparable petrol car. If you have solar panels, a solar-compatible unit (£50–£150 extra) diverts surplus generation into the car instead of exporting it for pennies, and pairs well with the cheap wins in our draught-proofing guide. In a power cut the charger simply stops and resumes — your car isn't a backup power station without vehicle-to-load kit, so keep our power outage checklist handy.
Maintenance really is five minutes a quarter:
- •Wipe the unit with a damp — not wet — cloth, and never point a pressure washer at it
- •Run the full cable through your hands, feeling for nicks, cuts or crushed sections
- •Check the holster and socket cap still click firmly home, keeping rain off the pins
- •Accept firmware updates in the app — they fix genuine safety and tariff bugs
- •If the charger's breaker starts tripping, don't keep resetting it — our guide to why a circuit breaker keeps tripping explains which causes you can fix and which need the electrician back
Found this useful?
There's plenty more — hundreds of guides and honestly-tested product reviews for every corner of your home.
Browse All Guides