DIY & Maintenance · 6 min read · 6 April 2026
How to Repair a Large Hole in Drywall (Plasterboard): The UK Method
A 250mm hole where a door handle met the wall is a two-evening job with a £30 shopping list. But three specific situations turn it into a job you should hand over.
By the Nims Casa editorial team — written from professional cleaning experience and checked against our editorial standards.
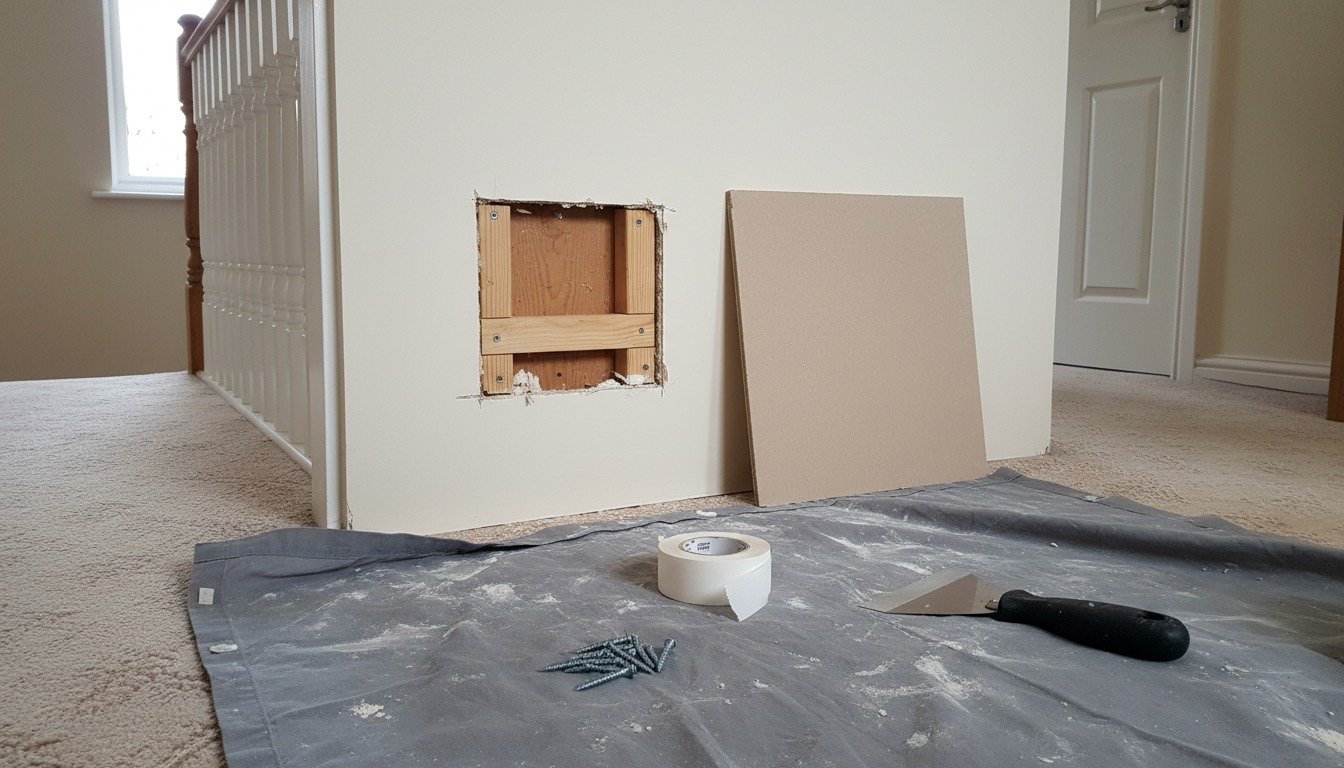
Anything wider than about 100mm has outgrown a mesh patch. Once a hole spans more than a hand's width there is nothing solid behind the filler, and a self-adhesive repair plate will telegraph a ghostly square through the paint within a heating season. The fix is not a better filler — it is putting timber back behind the board to screw a patch to.
On a standard stud partition that is well within a competent DIYer's reach. What is not is what sits inside the void, and whether that wall is doing a job the Building Regulations care about. Both come before the first cut.
Safety first: three checks before the saw goes in
A plasterboard saw goes through 2.5mm twin-and-earth without you feeling it. BS 7671 defines safe zones — within 150mm of the ceiling line or an internal corner, and directly above or below a socket — but on UK housing stock, especially anything altered by a previous owner, treat them as a hope, not a guarantee.
Second, check the board. If the house predates 2000 and the board is fibrous, greyish-brown at the broken edge and noticeably heavier than modern gypsum, stop. Asbestos insulating board turns up in 1950s to 1980s ceilings, soffits and airing cupboards, and it fools people. A UKAS lab sample costs £35 to £60.
Third, work out what the wall does. A bedroom partition is doing nothing structural. A wall between house and integral garage, or a flat's compartment wall, carries a fire resistance duty under Approved Document B and needs fire-rated board of the same thickness.
- •Kill the lighting and socket circuits at the consumer unit, not just at the switch.
- •Sweep with a cable and pipe detector, then again at 90 degrees to the first pass.
- •Open the first 20mm with a knife, not a saw, and look in with a torch before committing.
- •Wear an FFP3 mask. Gypsum dust reaches the lungs; a paper nuisance mask will not stop it.
Tools and materials, with real UK prices
A single repair costs £25 to £45 at Screwfix, Toolstation or B&Q. Buy a 1200 x 900mm 12.5mm sheet at around £9 rather than a full 2400 x 1200. Ceilings are often 9.5mm, so measure the broken edge first.
- •12.5mm plasterboard offcut — £8 to £11 (moisture-resistant green board for bathrooms, about £13)
- •25 x 50mm sawn timber or 18mm ply strip for battens — £3 to £5
- •32mm drywall screws £5 to £7; paper jointing tape, 150m, £4 to £6. Paper, not scrim
- •Gyproc Easi-Fill 60 or Toupret joint filler, 10kg — £14 to £19
- •Plasterboard saw £7 to £10; 250mm taping knife £10 to £16
- •Cable and pipe detector — £20 to £35, the best value item here
- •120 and 180 grit mesh sanding pads, dust sheet — £8
Realistic time and cost
Hands-on time for a 250mm hole is about 90 minutes. Elapsed time is 24 to 48 hours, because filler must dry between coats and a rushed second coat is the commonest cause of a patch cracking later. Cut, fit and first fill on evening one; second fill the next evening; sand and paint on day three.
Hand it to a plasterer and you pay a minimum charge, not an hourly rate — typically £110 to £180 for a half day, or £180 to £280 a day outside London and £250 to £360 inside the M25. Our breakdown of what plasterboard repairs cost shows where paying someone stops feeling extravagant, usually at three or more holes.
Step-by-step: the batten-and-patch method
Square the hole, fix timber inside the void overlapping sound board on two sides, then screw a patch to that timber. Everything after is filling and finishing.
- •1. Pencil a square around the damage with a spirit level, clear of crumbling edges. Squares are far easier to patch than freehand shapes.
- •2. If a stud falls inside the square, cut down its centre so the patch lands half on timber. UK studs sit at 400mm or 600mm centres — here is how to locate them without a detector.
- •3. Score the outline with a knife, then saw through, cutting away from suspected services.
- •4. Cut two battens 150mm longer than the hole is tall. Hold each overlapping sound board by 75mm top and bottom, and drive two 32mm screws into each end.
- •5. Cut the patch 3mm undersize both ways. A tight patch crumbles its edges going in; a 3mm gap fills invisibly.
- •6. Screw the patch to the battens, four per side, 15mm in from the edge. Closer and the board breaks out.
- •7. Bed paper tape over all four joins in a thin coat of filler, pressing until compound squeezes out. Trapped air becomes a blister.
- •8. Once dry, second coat 300mm wide, feathered outwards. Wide and thin beats narrow and thick.
- •9. Sand with 180 grit, wet or with a vacuum pole sander — see sanding plasterboard without dust.
- •10. Mist coat the bare filler with watered-down emulsion before painting, or it will flash against the wall around it.
Troubleshooting the repair
Hold a torch flat against the wall at a shallow angle and check before you paint, not after. A ridge you can feel means the filler is proud, not the patch — sand back and re-feather rather than adding more compound.
A hairline crack along one join within a fortnight almost always means scrim tape instead of paper, or a batten that can flex. If the line reopens twice, read why plasterboard cracks return; a moving substrate beats any filler. A patch that gives under thumb pressure has battens too short to grip — redo it with the full 150mm overlap. If the paint no longer matches, repaint the wall corner to corner; touching in rarely blends on anything but brilliant white.
The DIY-or-pro boundary: exactly where to stop
This is the part most guides fudge. Here is the honest line.
- •Do it yourself: any hole up to roughly 300mm in a non-load-bearing stud partition, at reachable height, scanned and confirmed clear of cables and pipes, on a matt-emulsion finish.
- •Call a professional: any wall separating the house from an integral garage, a loft stairwell or a neighbouring flat. A non-compliant patch on a fire-rated wall becomes a problem at sale or on a claim.
- •Call a professional: anything you suspect is asbestos insulating board. Sampling is cheap; disturbing it is not.
- •Call a professional: lath and plaster, common in pre-1930s homes — see repairing old plaster walls.
- •Call a professional: ceilings sagging across an area rather than holed in one spot. That is a fixing failure.
- •Call an electrician or plumber first if a cable or pipe crosses the damage. Moving it is their job; the patch is yours.
- •Call a plasterer for holes over 600mm, several in one room, or any wall with a polished skim finish.
Before you fill, find out why
A door handle with no doorstop makes the same hole again within a year; a £4 floor stop ends it. And if the board is soft or brown rather than cleanly broken, fix the leak and cut back to dry board first.
Found this useful?
There's plenty more — hundreds of guides and honestly-tested product reviews for every corner of your home.
Browse All Guides