Home Decor · 6 min read · 24 June 2026
How to Sand Drywall Without Dust: The UK Plasterboard Method
A single stud wall sanded dry will still be shedding gypsum into your carpet at Christmas. Here is the low-dust method UK dry-liners use, with real costs and a hard stop.
By the Nims Casa editorial team — written from professional cleaning experience and checked against our editorial standards.
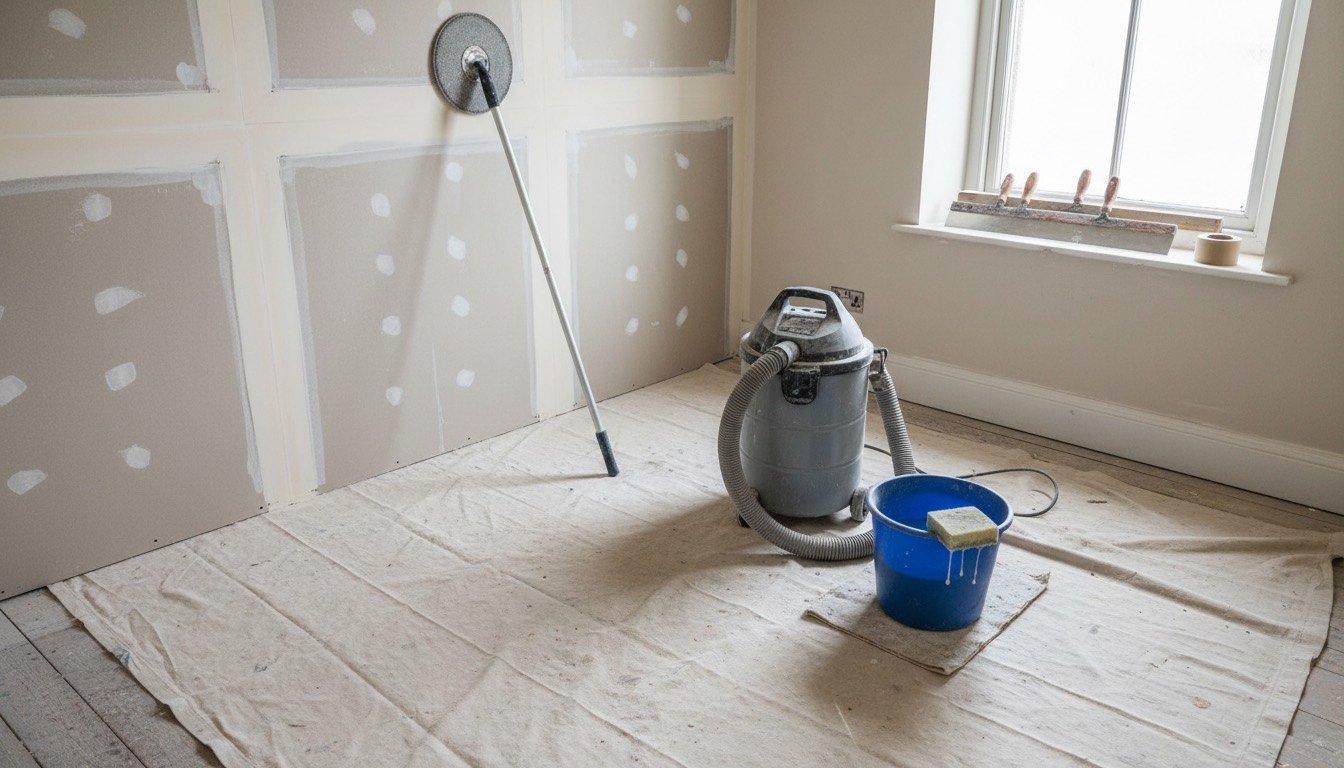
Fine gypsum dust behaves less like dirt and more like smoke. Hand-sand one 3m x 2.4m stud wall with a dry block and you push a couple of hundred grams of sub-10-micron particles into the air, which drift under doors and reappear every time the heating comes on.
The fix is mostly technique. About £40 of the right consumables and a slower hand at the filling stage removes most of the dust before you pick up an abrasive. The rest comes from choosing between wet sponge sanding and vacuum-assisted mesh sanding — and knowing which surfaces in a British house you must not sand at all.
Safety first: the dust is the actual hazard
Gypsum jointing compound is a nuisance dust, with UK workplace exposure limits of 10 mg/m³ inhalable and 4 mg/m³ respirable over eight hours. Dry hand-sanding a room clears both comfortably. It will not cause silicosis — gypsum is not crystalline silica — but it inflames the airways for days; some backing plasters and cheap fillers do contain silica.
- •Textured coating applied before 2000 (Artex, Wondertex, Suretex) may contain chrysotile asbestos. Never sand or scrape it — get a sample tested at a UKAS lab for £30-50 and read up on Artex removal first.
- •Wear an FFP3 disposable respirator, £2-4 each, and sealed goggles rather than safety glasses. FFP2 is the absolute floor; a merchant's paper mask does nothing.
- •Isolate at the consumer unit before unscrewing any socket or switch faceplate.
- •Get anyone pregnant, any infant and anyone asthmatic out of the house for the day.
- •Never dry-sand board with mould or water staining — you are aerosolising spores, and the damp needs fixing first anyway.
Tools and materials
You do not need a £1,200 planetary sander. For a patch or a single wall the sponge route is cheaper and cleaner; above roughly 15m² of jointed board, hire the machine.
- •Dual-grit drywall sanding sponges, £6-9 each — buy two so one can dry. Plus two buckets, one clean, one for rinsing.
- •Mesh abrasive in 120, 150 and 220 grit, £8-12 for ten, on a hand block or swivel-head pole sander (£12-25). Mesh clogs far less than paper and lets suction pull through it.
- •M-class dust extractor, £150-300 to buy or £18-25 a day to hire; a full dust-free sander and extractor package from HSS or Speedy runs £45-70 a day. A household vacuum blows the fines straight out of its exhaust; see our wet-and-dry vacuum guide.
- •LED work light on a stand, polythene, low-tack tape and dust sheets — about £20.
Realistic time, cost and skill level
Sanding is quick; masking and clean-down are not. Working from a fresh repair, drying dominates the schedule — check the timings in our guide to patching a hole in plasterboard and plan to sand the next day.
- •Skill level: beginner for a patch, intermediate for a full jointed wall.
- •One A4-sized patch: 10 minutes sanding, 20 minutes masking and clean-down, under £10 in consumables.
- •One 3m x 2.4m stud wall, taped and jointed: 45-75 minutes by sponge, 25-35 minutes with a vacuum sander. Materials £25-40.
- •A whole dry-lined room: 3-5 hours sanding plus a day of coats and drying, £70-110 in materials — against £180-280 for a decorator's day rate, or £250-350 in London.
- •Setting compounds like Gyproc Easi-Fill 45 dry hard and fight you; lightweight air-drying fillers such as Toupret sand with a third of the effort. Always use one for the final coat.
The method, step by step
This assumes the filler is fully dry: uniformly pale, not patchy grey. Sanding damp compound smears it, clogs the abrasive and guarantees you do the job twice.
- •1. Mask the doorway with polythene, leaving a slit to duck through. Open one window 100mm, keep the rest shut, and drape the furniture — gypsum in an upholstered sofa is a permanent resident.
- •2. Stand the work light on the floor 600mm out from the wall, angled up. Raking light shows every ridge; overhead lighting hides them until the emulsion goes on.
- •3. Knock down the high spots with a 250mm taping knife held nearly flat. Two minutes with a blade saves ten minutes of sanding and all its dust.
- •4. Sponge method: soak, wring until it stops dripping, and work the coarse face in small circles over the ridges only. Rinse every square metre; change the water when it goes milky.
- •5. Switch to the fine face and finish with long straight strokes along the joint, feathering outwards so there is no detectable step onto the board face. If the paper facing starts to fuzz you have over-wetted it — stop, dry, skim a thin coat over it.
- •6. Machine method: fit 120 grit mesh, set the extractor to its lowest suction that still holds the head, and keep the pad moving. Dwell for three seconds and it digs a saucer-shaped hollow. Finish at 220.
- •7. Leave the room 30 minutes for fines to settle, then vacuum and wipe skirtings, sills and the wall with a barely damp microfibre. Never sweep — a brush re-suspends everything you just captured.
- •8. Mist coat before the dust returns. Bare compound is far more absorbent than board paper, so seal it with watered-down contract matt, as covered in painting a room properly.
Troubleshooting
Nearly every fault that appears after painting traces back to a sanding error. None of them mean starting again.
- •Fuzzy, furry surface: raised paper fibres from over-wetting. Dry fully, seal with primer, skim thinly, re-sand at 220.
- •Tram lines under the paint: worn or over-coarse abrasive — anything below 100 grit tears plasterboard paper.
- •Joints still showing after two coats: feathering too narrow. A butt joint needs blending 250-300mm each side — the same root cause behind cracks that keep returning, covered in filling cracks and holes in walls.
- •Screw heads reappearing as dimples: you sanded the filler back out of the recess. Refill, dry, then knock back with the sponge only.
Where DIY stops and a professional starts
A competent DIYer can confidently sand filled screw holes and patches, tape-and-joint a single stud wall or chimney breast, wet-sand any repair at standing height, and run a hired dust-free sander on walls up to about 2.4m.
Four situations should send you to a professional, and none are negotiable. Any pre-2000 textured coating is an asbestos question and belongs with a contractor working to the Control of Asbestos Regulations 2012. Paintwork in a house decorated before the early 1990s may carry lead, which must never be dry-sanded — see lead paint safety in older houses. Ceilings and stairwells above roughly 2.7m need a tower, not a ladder; the Work at Height Regulations 2005 exist because people fall while both hands are busy. And a whole-house dry-lining finish is not worth learning on: a plasterer will skim it in a day.
The honest test: if the wall needs one bag of filler and one afternoon, do it yourself. If it needs scaffolding, a licence, or a laboratory result before you can start, that is not a DIY job. That is a quote.
Found this useful?
There's plenty more — hundreds of guides and honestly-tested product reviews for every corner of your home.
Browse All Guides