Carpets & Flooring · 6 min read · 8 May 2026
How to Repair a Cracked Tile (And When to Stop and Call a Tiler)
One cracked tile is a ninety-minute job if you go about it in the right order, and a ruined floor if you don't. Here is how tilers do it, what it costs, and where DIY has to stop.
By the Nims Casa editorial team — written from professional cleaning experience and checked against our editorial standards.
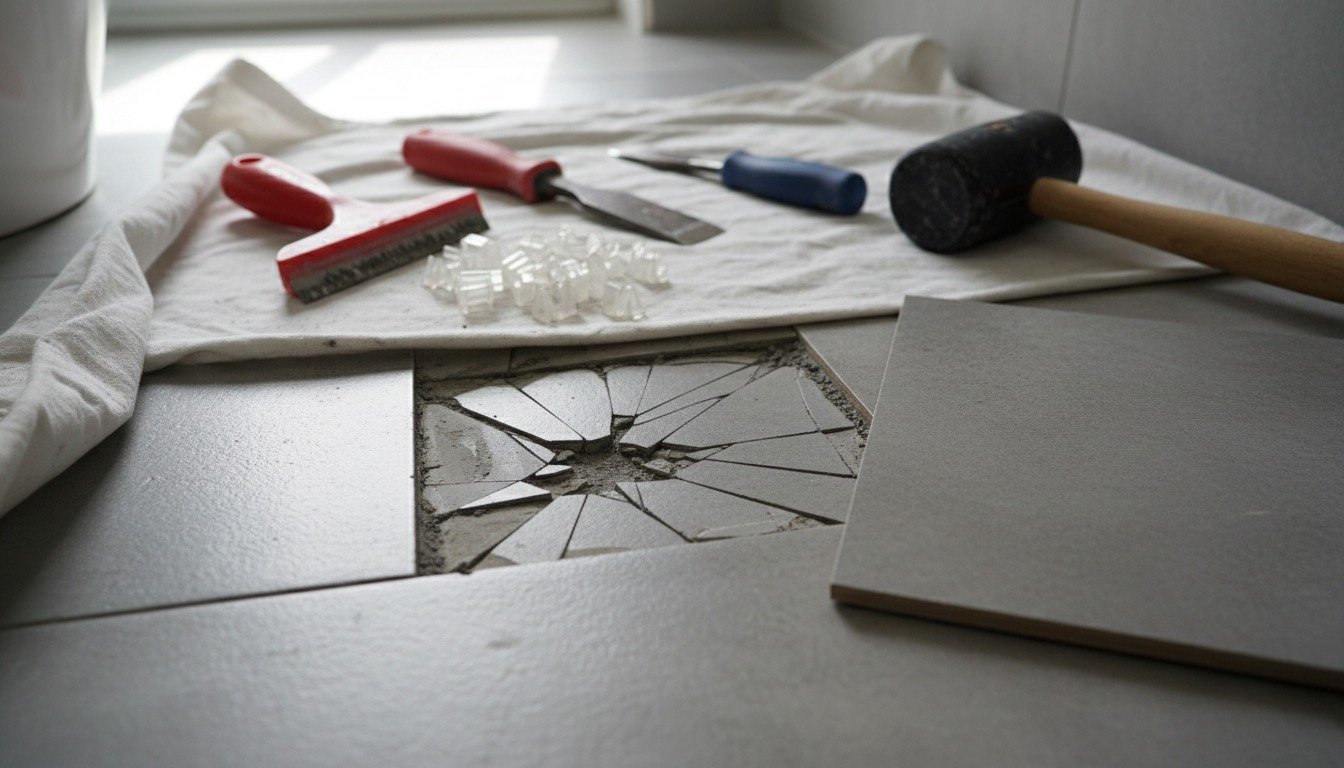
A single split tile in a hallway or shower is rarely the disaster it looks like. The awkward part is not lifting the broken one out; it is doing so without chipping the three tiles around it, and knowing whether the crack was the tile's fault or a warning about what lies underneath.
The method below is what we use on domestic jobs: diagnose first, cut the grout before you touch the tile, break outwards from the middle, bed the replacement solidly. It works on ceramic walls and porcelain floors alike — but not if the substrate is moving.
Safety first, and the two-minute diagnosis before it
Chiselling tile throws respirable crystalline silica, the genuinely harmful part of the dust. Wear an FFP3 mask, impact-rated goggles rather than safety specs, and gloves — shards from snapping porcelain travel further than people expect.
Before any of that, run a tap test. Knock across the tile and its neighbours with a coin: a sharp ring means it is stuck down, a hollow note means it has debonded. Then read the crack. A random crack through one tile is impact damage or a void beneath it. A straight crack running across several tiles, or one that keeps reappearing in the same place, is substrate movement — check the signs of subfloor damage first.
Check for services. On walls, sweep with a cable and pipe detector and stay out of the 150mm safe zones around sockets and internal corners. On floors, find out whether electric underfloor heating sits below: the mat lies in the adhesive bed, and a chisel will find it.
Tools and materials
Most of this is under £15 an item at Screwfix or Toolstation. An oscillating multi-tool makes it far easier.
- •Replacement tile matched on batch and shade code — take a broken piece to Topps Tiles if your spares box is empty
- •Grout rake (£6-£10), or a multi-tool with a carbide grout blade (£12-£20)
- •25mm bolster, narrow 10mm cold chisel, 500g lump hammer
- •6mm multi-material drill bit, drill with hammer action off
- •Notched trowel: 6mm for walls, 10mm for floors
- •Flexible cement-based adhesive, rapid-set on floors so you can grout the same day (from £12)
- •Grout to suit the joint width, levelling clips, grout float, two sponges, microfibre cloth
- •FFP3 mask, goggles, gloves, knee pads, dust sheet
Realistic time, cost and skill level
Allow 60-90 minutes of active work for one tile, then a cure period. Rapid-set adhesive is grout-ready in about three hours; standard-set needs 24 hours before grouting and another 24 before heavy traffic. Grouting a green bed is the commonest reason a repaired tile cracks again within the year.
Materials come to £25-£45, most of which you will not use. A tiler quotes £90-£180 for a one or two tile call-out, or £180-£300 a day across most of the UK and £250-£380 inside the M25 — half of that visit is travel and set-up, so batch repairs into one booking. For bigger areas, see our tile installation cost guide.
Skill level: intermediate. The chiselling is easy; judging bed depth so the tile finishes flush is what separates a visible repair from an invisible one.
Step by step: replacing a cracked tile
Work in this order. Attacking the tile first is exactly how neighbours get chipped.
- •1. Sheet up, open a window, and plug the shower gully or plughole below.
- •2. Rake the grout out of all four joints to full depth, keeping the blade square so you do not nick the glaze next door.
- •3. Mark two pencil diagonals on the tile and drill four or five 6mm holes along them, hammer off. That relieves it so it collapses inwards rather than levering against its neighbours.
- •4. Break it out with the narrow cold chisel, starting at the centre and working towards the edges. Never chisel inwards from the perimeter.
- •5. Switch to the bolster at a shallow angle for the last pieces, so force goes down into the bed rather than sideways.
- •6. Scrape the old adhesive back to a flat, sound bed, then vacuum. Any ridge left behind holds the new tile proud.
- •7. Dry-fit the replacement and check with a straightedge that you have 4-6mm of depth.
- •8. Comb adhesive into the recess and butter the back of the tile. On floors and in showers aim for 100% solid coverage — voids are what cracked the first one.
- •9. Bed the tile, tap down with a rubber mallet, fit levelling clips, check flush both ways, and clean the joints while soft.
- •10. Cure, then grout to match the joint width — the choice between sanded and unsanded grout matters more than colour above 3mm.
- •11. Sponge off in two passes, polish the haze with a dry microfibre after two hours, and use flexible silicone, not grout, where the tile meets a bath, tray or floor junction.
Troubleshooting the usual problems
- •New tile sits proud: lift it while the adhesive is workable and take more bed out. Once cured, you must remove it again.
- •Grout is a different shade: fresh grout dries lighter, so give it a fortnight. If it still jars, deep-clean the whole run with our method for cleaning grout without wrecking it, or colourant the full floor.
- •A neighbour chipped on removal: small glaze chips take a two-part epoxy tinted to match. Honest work, not invisible.
- •The crack returns along the same line: movement, not adhesion. Stop replacing tiles and find out why the substrate flexes — recurring cracked joints tell the same story, covered in why grout cracks.
- •Hollow tiles all around: the bed has failed over a wide area, and patching one tile is good money after bad.
The DIY-or-pro boundary: where to stop
Being straight about this saves money. A competent DIYer can replace one to four cracked ceramic or porcelain tiles on a sound wall or floor, rake and renew grout, refresh silicone, and epoxy-fill a hairline crack in a dry wall tile. None of that is notifiable and none of it touches structure or services.
Hand it over when electric underfloor heating runs beneath. A severed element means lifting the whole mat, and in England and Wales a bathroom is a special location under Part P of the Building Regulations, so the repair needs a registered electrician or notification to building control. Our underfloor heating and flooring guide explains the build-up.
Call someone in too for tiles inside a tanked wet room, where chiselling can puncture the membrane and the leak stays hidden for months; for cracks running in a straight line across several tiles, which points at deflection and wants a builder first; for large-format porcelain over 600mm; for a crack that arrived with a damp patch or rising water bill, where a plumber goes first; and for pre-2000 floors with vinyl or bitumen underneath, which can contain asbestos and must be tested, never ground or sanded.
The honest test: if something hit the tile, fix it yourself. If the floor moved, fixing the tile fixes nothing at all.
Found this useful?
There's plenty more — hundreds of guides and honestly-tested product reviews for every corner of your home.
Browse All Guides