Roofing & Exterior · 7 min read · 15 June 2026
How to Repair Deck Boards: A UK Step-by-Step Guide (Tools, Costs and the DIY Limit)
One soft board rarely means the deck is finished. Here is the joiner's sequence for replacing failed boards, with UK costs, timings, and the point where the job stops being yours.
By the Nims Casa editorial team — written from professional cleaning experience and checked against our editorial standards.
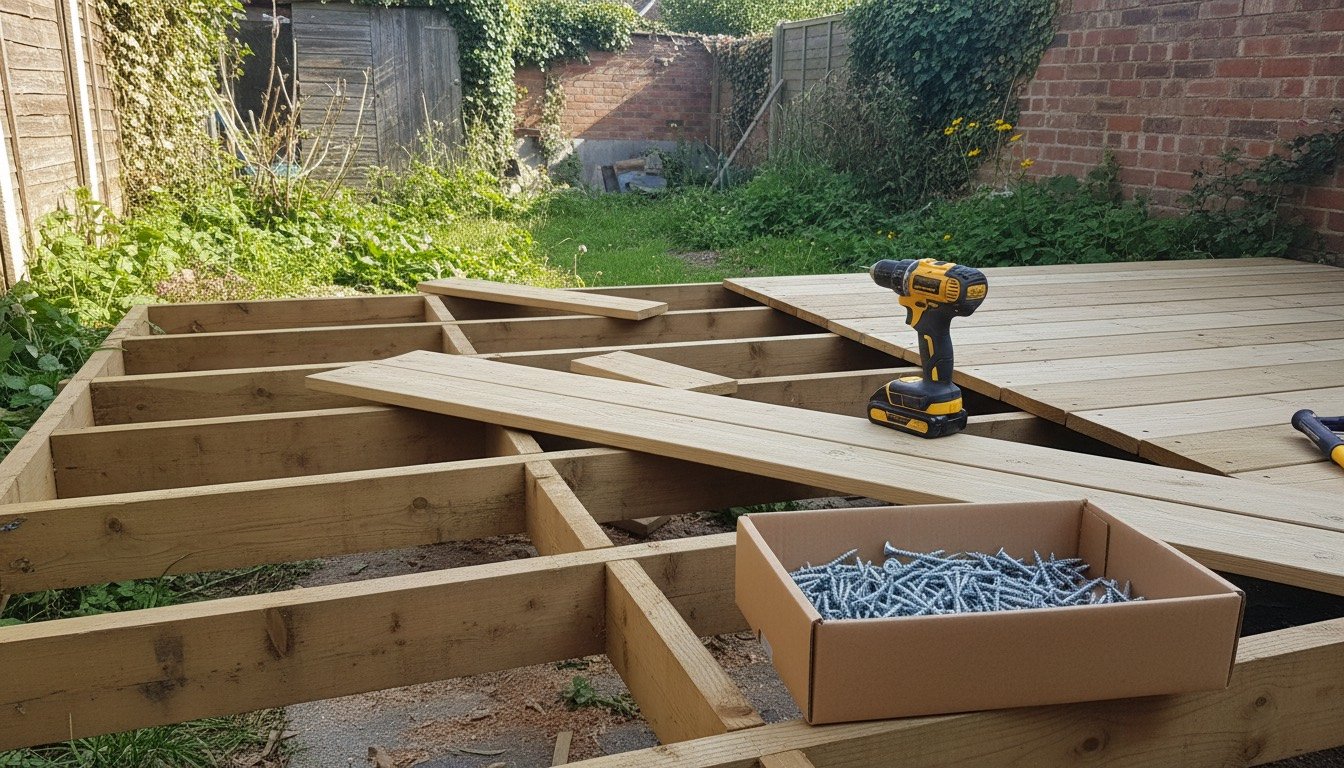
A single spongy board rarely means the whole deck is finished. On UK softwood decks the rot is almost always local: the board under a downpipe splash, the cut end nobody sealed when the deck was built, or the run tight against the house wall where nothing ever dries. Replace those properly and you buy another eight to ten years out of an otherwise sound frame.
What follows is the sequence a joiner works through, with the honest boundary marked in it. Some of this is straightforward weekend work. Some of it is not, because a raised deck that fails does not fail politely.
Safety First: What Can Actually Hurt You Here
Two hazards get underestimated. The first is the timber. Treated softwood is loaded with copper-based preservative, and decks built before 2004 may be CCA-treated with chromated copper arsenate, withdrawn from domestic use in the UK and EU that year. Never burn offcuts, never dry-sand old boards without extraction, wear an FFP3 mask when cutting, and wash your hands before you eat. That is the actual exposure route, not fussiness.
The second is the structure. A deck more than 600mm above ground becomes a genuine fall risk the moment you start removing boards, and Approved Document K treats guarding at that height as a requirement rather than a nicety. Before you prise anything up, look underneath: lighting cable, an irrigation line, a soil pipe, and in high summer a wasps' nest are all common. Keep to the basics on the power tool safety checklist, and never put your weight on a joist you have not probed.
Tools and Materials You Actually Need
Nothing here is exotic. The multi-tool and the moisture meter are the two purchases that earn their keep.
- •Cordless combi drill plus an impact driver, one for pilot holes and one for driving
- •Oscillating multi-tool with a wood and nail blade, the cleanest way to cut a fixed board out without wrecking the joists
- •Circular saw with the depth set to 34mm for 32mm boards, or a jigsaw if you are less confident
- •Wrecking bar plus a scrap batten to lever against, so you do not crush the neighbouring boards
- •Pin punch for old ring-shank nails, and a stubby screwdriver for probing suspect timber
- •Pin-type moisture meter, £20 to £35: over 20% in a joist during dry weather means water is being trapped
- •Matching boards, usually 32 x 125mm or 32 x 150mm treated softwood in 2.4m, 3.0m or 3.6m lengths
- •Decking screws, 5.0 x 60mm, stainless A2 as standard and A4 within a couple of miles of the coast
- •End-grain preservative at roughly £14 to £18 a litre, and a roll of butyl joist tape
- •FFP3 mask, safety glasses, gloves and knee pads
Realistic Time and Cost
Replacing three or four boards on a ground-level deck is a half-day job: an hour to survey and lift, an hour to cut, treat and fit, and the rest lost walking to the shed. Add a joist repair and it becomes a full day, because the joist has to be exposed, allowed to dry, treated, and then either sistered or swapped out entirely.
Materials are cheap; access and labour are what cost. In 2026 a 3.6m treated deck board runs £14 to £19 at Wickes, B&Q or a timber merchant, a 3.6m length of 47 x 100mm C16 treated joist is £11 to £16, and a 200-screw box of stainless decking screws is £20 to £28. Four boards with preservative and fixings lands around £90 to £120. Handing it over costs £180 to £280 a day for a joiner outside London and £260 to £380 inside the M25, or something closer to typical handyman rates for a two-board swap. Before you commit three weekends to patching, it is worth knowing what a new deck costs so the sums are honest.
Step by Step: Replacing a Failed Deck Board
Do the survey properly before you order timber. Half of all botched deck repairs are boards replaced over a joist that was the real problem, which is why steps one and six matter more than the cutting.
- •Probe every suspect board and the joist beneath it with a screwdriver. If the blade sinks more than 5mm under hand pressure, that timber is gone rather than just weathered.
- •Mark your cut lines directly over the centre of the joists either side of the damage, using the existing screw lines as your guide.
- •Back the screws out. If the heads are rounded, drill them with a 5mm bit or use a screw extractor rather than hammering at the board.
- •Cut the board free with the multi-tool held flat against its neighbours, or a circular saw set 2mm deeper than the board so you do not bite into the joist.
- •Lever the section out with the bar resting on a scrap batten, then clear old screws, grit and leaf mulch off the joist tops.
- •Inspect and treat the joist: scrape back any soft surface, let it dry, brush on two coats of end-grain preservative, then run butyl joist tape along the top. That tape is the single reason the next board lasts.
- •Cut the replacement 3 to 5mm short at each end for movement, and seal every cut face with preservative before it goes anywhere near the frame. This is the step people skip, and it is why repairs fail in four years instead of twelve.
- •Pre-drill two 4mm pilot holes per joist, 20 to 25mm in from the board edge, and drive stainless screws until each head sits about 1mm below the surface.
- •Set a 5 to 6mm gap between boards using offcut spacers. UK softwood arrives wet and will shrink, so a tight fit today becomes a trapped-water trap next winter.
- •Leave new timber to weather for 8 to 12 weeks before finishing, then even out the colour. The prep sequence in our guide to staining a deck matters far more than which tin you buy.
Troubleshooting the Problems That Come Up
Almost every complaint after a board swap falls into one of six patterns, and most are the frame telling you something.
- •New board sits proud of the run: the joist top has swollen or debris is trapped. Lift it, take 2 to 3mm off the joist with a sharp block plane, re-treat and refit.
- •Screws spin without biting: the joist is soft. Do not reach for longer screws, fit a sister joist or a repair plate. A spinning screw is telling you the frame is the job.
- •Board cups upward within a month: it was fitted heart-side down or dried unevenly on one face. Reverse it while it is still loose, otherwise live with it until the next swap.
- •New board is far lighter than the rest: entirely normal. Twelve weeks of British weather closes most of the gap and a tinted decking oil closes the remainder.
- •Deck still feels springy after the repair: joists are probably at 600mm centres rather than 400mm, or a bearer has dropped. That is structural, not cosmetic.
- •Green film returns quickly over the repaired area: the deck is not drying out. Fix the shade or drainage and follow a proper decking clean rather than blasting it with a pressure washer at full pressure.
Where DIY Stops and a Professional Starts
This deserves stating plainly. A competent DIYer can replace deck boards, re-screw loose ones, swap a rotten fascia, scrape and treat joists, and sister a single joist on a deck sitting within 300mm of the ground. None of those jobs carry a collapse risk or any regulatory exposure, and the worst outcome is a wasted afternoon.
Stop and bring in a joiner or builder for any of the following: rot in the posts or bearers of a raised deck; a platform more than 600mm above ground where guarding or balustrade posts feel loose; any case where the ledger board fixed to the house wall is soft, because a failed ledger is how decks come away from buildings and a badly fixed one bridges the damp-proof course; decks over a garage, cellar or habitable room; and any new outdoor circuit for deck lighting, which is notifiable under Part P and needs a registered electrician or a Building Control application.
There is also a point where repair simply stops being sensible. If more than about a fifth of the boards fail the screwdriver test, or the frame is untreated timber sitting straight on soil, you are patching a deck that will keep eating your weekends. That is the moment to price a rebuild honestly and to work out whether composite decking pays back over ten years for your particular garden, shade and exposure.
Found this useful?
There's plenty more — hundreds of guides and honestly-tested product reviews for every corner of your home.
Browse All Guides