Home Decor · 5 min read · 23 June 2026
How to Patch Drywall (Plasterboard): Diagnose It First, Then Fix It
Most failed wall repairs are diagnosis failures, not filling failures. Work out which of eight faults you actually have, then pick the patch that suits it.
By the Nims Casa editorial team — written from professional cleaning experience and checked against our editorial standards.
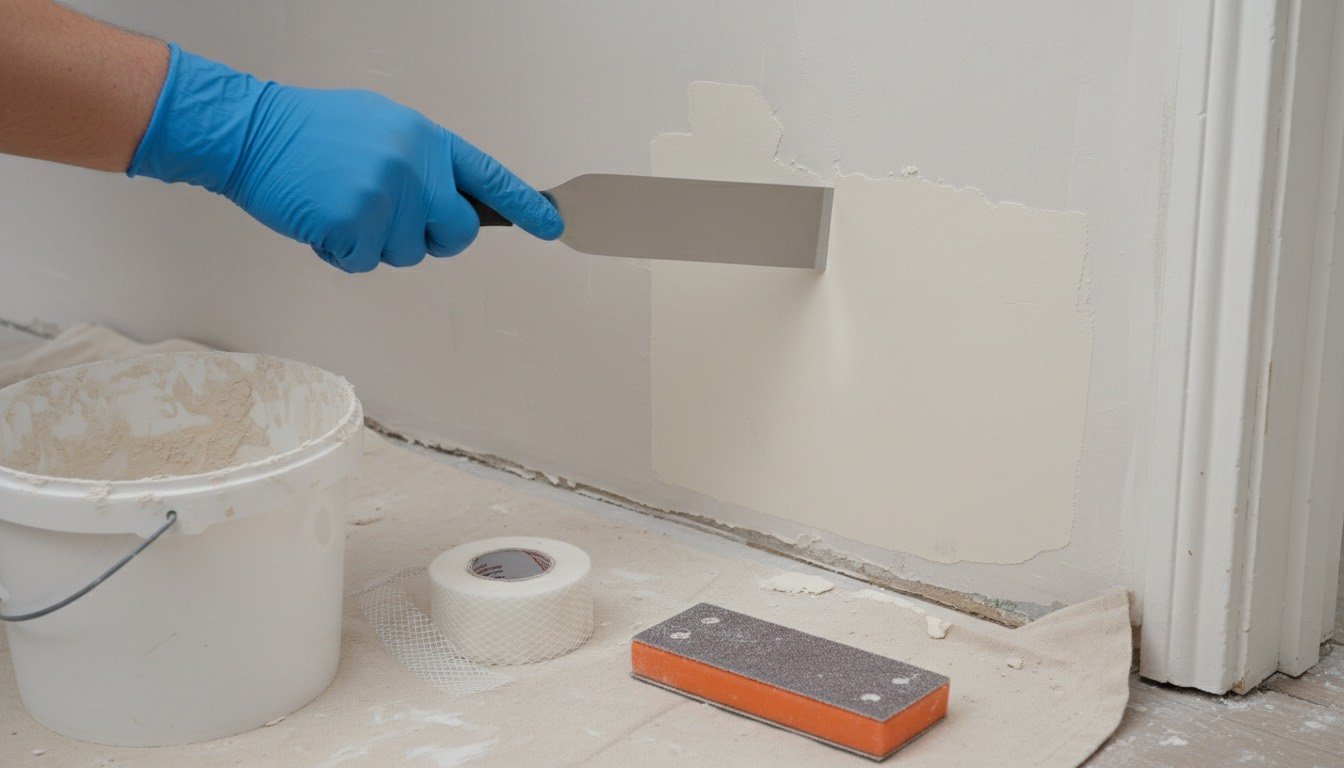
Somebody sees a crack, fills it, sands it, paints it — and by the following February the same line is back in exactly the same place. The filler did nothing wrong. It was asked to solve a problem it was never going to solve, because nobody spent ten minutes working out what the damage actually was. Wall repairs fail at the diagnosis stage far more often than at the filling stage.
Patching plasterboard is a genuine beginner job for anything up to roughly a 150mm hole. The catch is that it is a three-day job containing about 40 minutes of real work. Drying time does most of the labour, and there is no way to buy your way out of it. Rush the coats and the repair will telegraph through the paint the moment low winter sun rakes across the wall.
Start with a diagnosis, not a tub of filler
Tap the wall around the damage with a knuckle, then run a torch across it at a shallow angle from the side. Those two checks separate almost every fault you will meet in a UK home. Work down this list and stop at the first match.
One preliminary matters: confirm what you are repairing. A modern stud wall or a dot-and-dab masonry wall is plasterboard with a thin skim over it; a pre-1930s house may well have lath and plaster, which behaves completely differently under a filling knife. If you are unsure, the differences between plasterboard and traditional plaster walls are worth five minutes before you cut into anything.
- •Hairline crack that reappears in the same line every winter, often above a door or along a wall-to-ceiling junction — this is movement, not a hole. Rigid filler will always crack again; you need scrim tape and a flexible finish. If it has already come back twice, read up on why plasterboard cracks keep returning before repairing it a third time.
- •A small circular bulge or a popped screw head, usually in a line up a wall — a fixing has worked loose from the timber stud. Drive a new 32mm drywall screw 50mm above or below it, then fill both.
- •A straight crack running floor to ceiling at roughly 1200mm intervals, or outlining a rectangle — a board joint whose tape has failed. Rake it out, re-tape, then feather three coats wide.
- •A dent with the paper face unbroken — cosmetic only. One thin skim of filler, sanded, done in an hour.
- •A hole under about 40mm with sound board around it — mesh patch and filler; no cutting required.
- •A hole of 40-150mm, or a doorknob strike — cut a neat square and fit a plasterboard offcut or an aluminium repair plate.
- •Anything over 150mm, or damage crossing a stud — this becomes a board replacement rather than a patch; see the method for larger plasterboard holes.
- •Soft, brown-stained, slightly crumbly board — water. Do not fill it. Find and stop the source first, or you will be repairing the same square metre annually.
Safety first: what is behind the wall
Plasterboard is 12.5mm thick and hides everything. The genuine risks here are electrical, not structural, and one of them is respiratory.
- •Run a combined cable and pipe detector over the area before any blade goes in. Under BS 7671, cables run in safe zones — within 150mm of a corner or ceiling, and directly above or beside sockets and switches — but plenty of older DIY wiring ignores this entirely.
- •If the damage sits within 150mm of a socket, switch or light fitting, turn that circuit off at the consumer unit before cutting.
- •Score the paper face with a knife and snap the board rather than sawing blind. If you must saw, set the blade depth to 15mm.
- •Textured coatings applied before 2000 may contain asbestos. Do not sand, scrape or drill them; a sample test through a UKAS laboratory costs around £30-50 and settles it.
- •Wear an FFP3 mask when sanding. Gypsum dust is fine enough to stay airborne for hours, and it will end up in every soft furnishing in the room — one reason low-dust sanding methods are worth the extra effort.
Tools and materials
For a single repair you can buy the lot for under £45, and most of it lasts years. Skip the branded repair kits unless you genuinely only ever want one patch out of it.
- •Setting filler such as a 45-minute jointing compound, 10kg bag, around £14-18 — far better than tubbed lightweight filler for anything structural.
- •Ready-mixed jointing compound, 5 litres, around £13-17, for the final skim coat only.
- •Self-adhesive scrim tape, 90m roll, around £4.
- •Filling knives: 50mm and 200mm, around £12 the pair. The wide one is what makes the patch invisible.
- •Plasterboard offcut (12.5mm), around £9-12 for a 1200 x 900mm sheet, or a 100mm aluminium repair plate at around £4.
- •Utility knife, drywall saw, 32mm drywall screws, mixing bucket, 120 and 180-grit sanding sponge, dust sheet and an FFP3 mask.
- •Cable detector, around £25-40 — the single cheapest piece of insurance in this list.
Realistic time and cost
A dent costs pennies and takes an hour. A doorknob hole costs about £6 in materials and takes 45 minutes of hands-on work spread over three days: fit and fill on day one, second coat on day two, sand and paint on day three. Setting compound is workable for 45 minutes but needs a full 24 hours before it takes a second coat properly in a cool British hallway.
Paying someone changes the maths sharply. A handyman will rarely turn out for less than a £70-120 minimum charge, and a plasterer skimming a full wall to hide multiple patches is typically £180-320 depending on region and access. Our breakdown of plasterboard repair costs and typical handyman rates for small jobs puts real numbers against both routes.
The repair, step by step
This is the cut-and-patch method for holes between 40mm and 150mm. For cracks and dents, jump straight to steps 6 onwards.
- •1. Check for cables and pipes, and isolate the circuit if anything is close.
- •2. Pencil a square or rectangle around the damage, at least 20mm clear of any crushed board. Straight lines fill far more predictably than ragged ones.
- •3. Score the lines with a utility knife, then cut through with a drywall saw. Remove the waste piece and pull out any loose paper.
- •4. Cut a plasterboard offcut to the same size. Aim for a 2-3mm gap all round — tight-fitting patches crack at the edges.
- •5. Support it. Either screw two timber battens behind the opening and fix the patch to them, or use an aluminium repair plate, which needs no backing at all.
- •6. Mix setting compound to a thick yoghurt consistency in a clean bucket. Any set material left in the bucket accelerates the next mix and ruins it.
- •7. Bed scrim tape over every joint or crack, then press compound through it with the 50mm knife. Fill flush, not proud.
- •8. Leave 24 hours. Apply a second coat with the 200mm knife, feathering 150mm beyond the patch on all sides. This width is what stops the repair showing.
- •9. Sand lightly with a 180-grit sponge, using a torch held flat against the wall to reveal high spots. Do not sand into the paper face of the surrounding board.
- •10. Prime the patch before painting. Bare filler is far more absorbent than the wall around it, which is exactly why priming separately beats paint-and-primer-in-one on repairs.
Troubleshooting: why your patch is showing
- •A visible pale rectangle after painting — the filler was not primed, so it absorbed more paint. Prime and recoat the whole wall between corners.
- •A shallow shadow or hump seen from the side — the coats were too narrow. Add a further skim feathered 250mm wide, then sand.
- •The crack reopened within weeks — no scrim tape, or genuine movement. Rake it out to 5mm wide, tape properly, and accept a flexible decorator's caulk if it sits at a junction between two materials.
- •Pinholes appearing as it dries — the mix was too wet or was overworked. Skim once more with a stiffer mix.
- •Filler that would not go off — the bucket was contaminated, or the room was under 5°C. Setting compounds behave badly in an unheated hallway in January.
- •Brown staining bleeding back through fresh paint — water, not a filler fault. Trace the source, dry the area completely, then seal with a stain-block primer.
When to stop and call someone
There are four points where carrying on costs more than getting help. Recurring cracks along the same line usually mean movement in the structure, and repeated filling only hides evidence a surveyor would want to see. Damp or stained board means the moisture must be traced first — condensation, a failed seal or a leak above — and dealing with the damp itself has to come before any patching.
Similarly, once you are looking at four or five patches on the same wall, a plasterer skimming the whole surface will give a better result for less than the sum of the individual repairs, and gives you a clean surface to work from when you next decorate the room properly. And any damage around a light fitting, a socket or a boiler flue is an electrician's or a Gas Safe engineer's job before it is a filler job. Nobody has ever regretted stopping at that line.
Found this useful?
There's plenty more — hundreds of guides and honestly-tested product reviews for every corner of your home.
Browse All Guides