Laundry & Fabric Care · 6 min read · 14 April 2026
Why Is My Washing Machine Leaking? Trace It Before You Fix It
A puddle by the plinth tells you almost nothing on its own. Here is the four-cycle diagnostic path engineers use to find which part is actually failing, before you buy anything.
By the Nims Casa editorial team — written from professional cleaning experience and checked against our editorial standards.
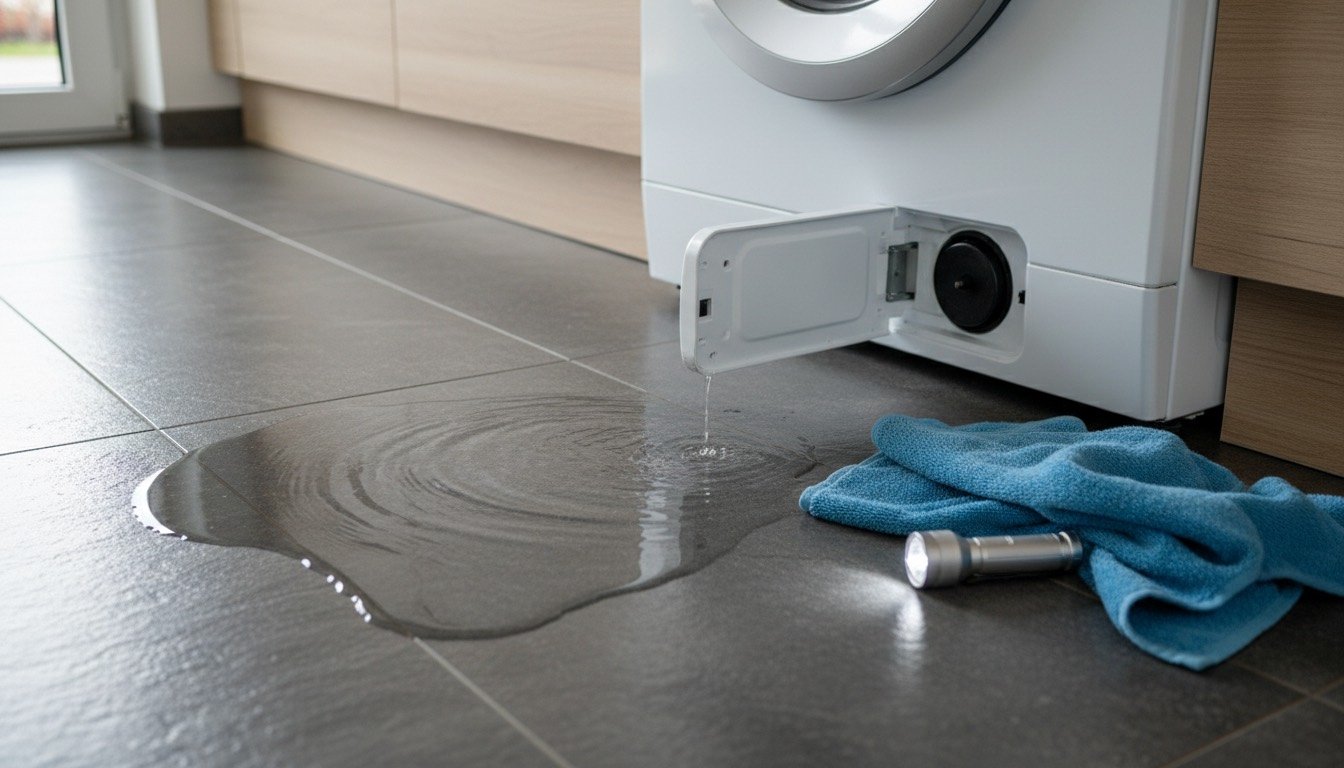
Water on a kitchen floor rarely appears where it started. The base tray, plinth and levelling feet channel it forwards, so a split hose at the back and a perished door seal at the front make the same pool by your toes. Fit a new seal on a guess and the floor is wet again by Tuesday.
The fix is usually cheap; the diagnosis is where the money goes. Work through the four-cycle test below and you will know which part is at fault in forty minutes, without removing a panel. If the machine also refuses to empty or spin, read the order to check when a washer won't spin or drain first: a blocked pump causes both.
Quick Diagnosis: Four Cycles That Name the Culprit
Safety first: you are mixing water with a 13A appliance. Unplug at the socket, kill the fused spur on an integrated machine, and close the blue washing machine valve under the sink. Pull it forward onto a folded towel, then dry the floor and base tray completely: you cannot diagnose a leak on top of yesterday's.
Lay dry kitchen roll in a grid: two sheets at the rear under the tap connections, two beneath the middle, two across the front under the door and filter flap. Whichever wets first is the answer.
- •Stage 1, fill only. Start a cold 30C cycle and stop it as the drum finishes filling. Wet paper at the rear means the inlet hose, tap connection or fill valve.
- •Stage 2, wash without spin. Agitate ten minutes on a full drum. Water at the front means the door seal, its clamp band or the drawer; at the rear, the tub or tub-to-pump hose.
- •Stage 3, drain. A leak appearing only now means the pump housing, the filter cap seal or the corrugated waste hose.
- •Stage 4, final spin. Wet only at 1200 to 1400rpm means a hose sound at rest that unseats under pressure, or a failing bearing seal.
- •Dry through all four but a puddle hours later? That is syphoning from an under-sink spigot, or a drip from the tap gland.
Symptom to Cause: Reading the Puddle
The stage narrows it; the physical signs confirm it. Take a torch and look properly.
- •Clean cold water at the rear wall, worse with the tap open: inlet hose washer, tap gland or perished hose.
- •Warm soapy water at the front sill, grey slime in the seal's lower fold: split door bellows.
- •Water from one bottom corner with a rattly pump: cracked housing, or a filter cap off its O-ring.
- •Water down the fascia below the drawer: blocked drawer jets or limescale, standard in hard-water counties.
- •Rusty staining down the rear casing with a rumbling spin: bearings, the fault that ends machines.
Causes, Ranked by How Often We Find Them
Door seals fail first because they take the most abuse: bra wires, coins and keys cut the lower fold, and cold-only 30C washing leaves mould that perishes the rubber. Pump and filter faults come next, usually because the filter has never been opened.
- •1. Door seal split, holed or badly clamped: roughly a third of front-loader leaks.
- •2. Pump filter cap loose or cross-threaded, its O-ring flattened and dry.
- •3. Inlet hose washer perished, or the hose cracked at the bend.
- •4. Waste hose unseated from the standpipe, often after the machine was pulled out.
- •5. Blocked detergent drawer syphon overflowing the housing.
- •6. Cracked pump housing or sump hose, usually a coin sawing at it for months.
- •7. Drum bearing and shaft seal failure. Least common, most terminal.
Fixes, Ordered from Lowest Risk to Highest
Work in this order, machine unplugged and tap closed, bowl and old towels ready. A drum holds 15 to 20 litres and it does not come out politely.
- •Reseat the waste hose. Five minutes, free. Push it 10 to 15cm into the standpipe, no deeper, with the loop top 60 to 90cm above the floor. Too low and the drum syphons mid-cycle.
- •Clean and reseal the pump filter. Twenty minutes, under £5. Tilt the machine gently back so water runs into the drum, bail into a shallow tray, then unscrew the filter. Wipe the O-ring, smear it with washing-up liquid and refit finger-tight.
- •Replace the inlet hose. Fifteen minutes, £8 to £14. Hand-tighten only, rubber washer square. Change any hose over five years old whether it leaks or not: a burst fill hose is the most destructive failure a kitchen sees.
- •Descale and clear the drawer. Thirty minutes, about £3. Clear the syphon cap, then run a 90C empty wash with citric acid. Method in our guide to cleaning a washing machine; if odours came back too, the gasket and drum routine handles that.
- •Replace the door seal. Two hours, £25 to £55 for the part. Release the outer spring clamp with a flat screwdriver, peel the bellows off the front lip, then the inner clamp behind the fascia. Photograph the drain hole positions first: refitting it rotated causes a fresh leak.
- •Replace the drain pump or sump hose. Two to three hours, £18 to £40 in parts, machine on its side. Only if jubilee clips and spade connectors hold no fear.
What It Costs to Get Someone In
An independent engineer charges £60 to £95 for a diagnostic visit covering the first half hour, parts and labour on top. A door seal fitted lands at £120 to £190, a drain pump £110 to £170, bearings £220 to £300 — which is why bearings on a £330 machine are a write-off. Our appliance repair cost breakdown has the wider picture, and how long appliances last is worth reading first.
The rule we use: if the quote exceeds half the price of a comparable new machine and yours is over seven, replace it. Our shortlist of reliable washing machines favours accessible filters for that reason.
Where DIY Stops
Stop and call someone the moment any of these applies. Each is a point where amateur work makes things worse.
- •The RCD trips when you plug in, or water in the base tray is touching the motor or wiring loom. Leave it unplugged.
- •The leak is at the tap, standpipe trap or pipework in the wall rather than the machine. See what a plumber costs by job.
- •There is a burnt smell, scorched connectors or discoloured wiring behind any panel.
- •The drum has visible play when rocked by hand and spin brings a grinding roar.
- •The machine is under warranty. Opening it voids the cover, and the clamp marks give you away.
- •Water has reached a neighbouring flat or the ceiling below. Isolate, contain, photograph, and notify your insurer first.
Keeping It Dry From Here
Three habits prevent nearly every leak above. Clean the pump filter quarterly, running a finger round the seal fold for grit and wire. Replace both fill hoses every five years, braided aquastop versions if the machine sits on a wooden floor upstairs. Run a 90C empty wash monthly in hard-water areas, because limescale stiffens drawers, valves and seals.
Put all three on a written rota rather than trusting memory. The printable appliance maintenance checklist covers the washer alongside the dishwasher and fridge, and if the leak ran for a while, the signs of hidden water damage tell you whether the units and floor need attention too.
Found this useful?
There's plenty more — hundreds of guides and honestly-tested product reviews for every corner of your home.
Browse All Guides