Home Decor · 6 min read · 22 June 2026
How to Fix Cracks in Plaster Walls: UK Steps, Honest Costs and When to Stop
Most plaster cracks are cosmetic and cost under £30 to fix properly. A few are the building talking to you. Here is how to tell them apart, and what a fair quote looks like.
By the Nims Casa editorial team — written from professional cleaning experience and checked against our editorial standards.
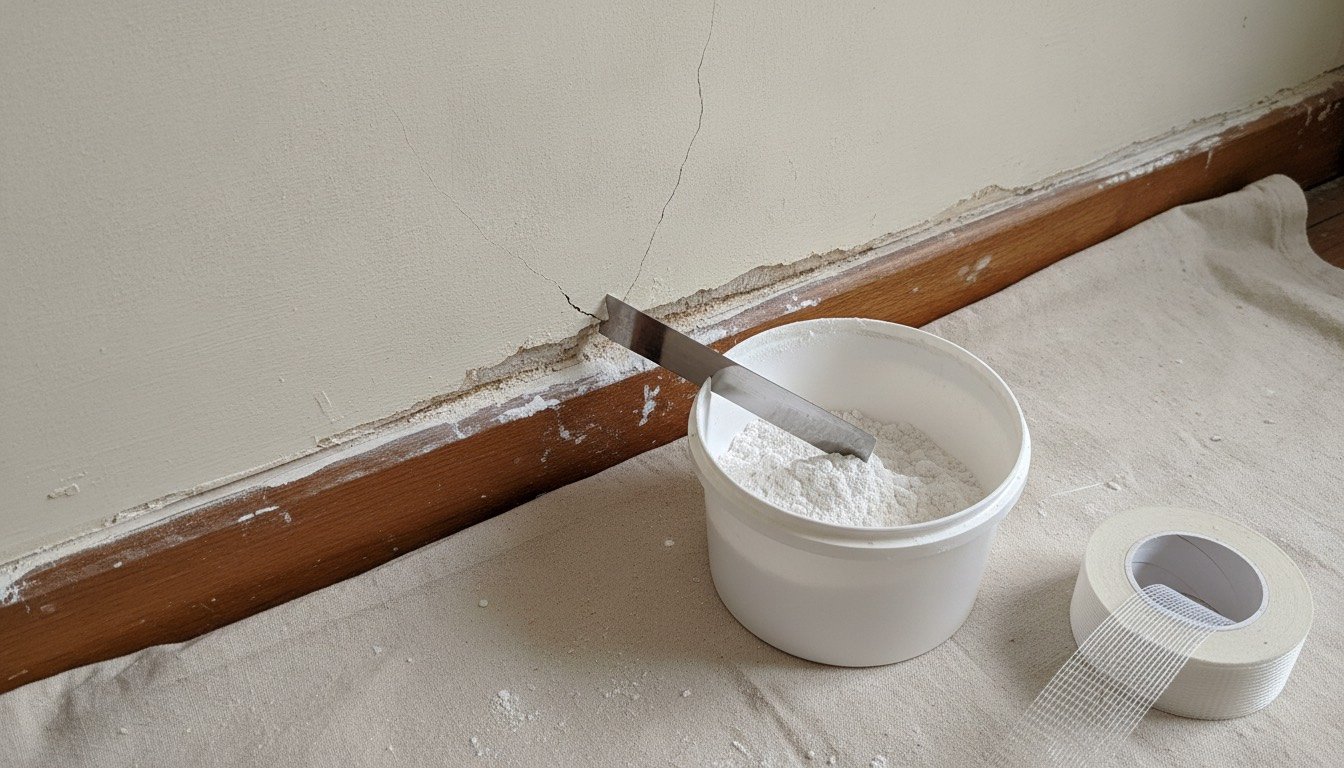
Clay subsoil swells in winter and shrinks in a dry August, radiators go on in October and off in April, and plaster has almost no tensile strength, so it gives that movement up somewhere. Nine cracks in ten are cosmetic and take an evening plus drying time. The tenth is the building telling you something, and filling it hides the evidence for another year.
So the order matters: diagnose, decide whether the job is yours, then buy filler. Here is all three, plus why labour is almost always 80 to 90 per cent of any quote for this work.
Safety First, and the Two Checks That Come Before Filler
A power sander makes all three real hazards worse. Textured coatings applied before 2000 may be asbestos-containing Artex: never sand or dry-scrape them, and pay £30 to £60 for a lab sample instead. Pre-1992 paint may contain lead, so wet-sand only and read lead paint safety in old houses first. Plaster dust carries crystalline silica, so wear an FFP3.
- •Tap test: rap the wall either side of the crack. A crisp note means the plaster is still bonded; a hollow, drummy note means the key to the lath has failed, and filler over it will crack again within a season.
- •Movement test: pencil a dated line across the crack and measure its width, or fit a glass tell-tale (about £8). Leave it six to eight weeks, autumn into winter. Static means filling job; widening means diagnosis job.
- •Run a cable and pipe detector (£25 to £45) over the wall first. Cracks often follow buried chases, and 5mm is deep enough to reach a cable.
Tools and Materials, With What They Cost
A first-time kit from Screwfix or Toolstation lands at £70 to £110. If you already own knives and a caulk gun, £25 to £35 of consumables covers every hairline crack in a three-bedroom house.
- •Stainless filling knives, 50mm and 150mm, £8 to £18 the pair. Carbon steel rusts and stains fresh filler.
- •Stanley knife or triangular shavehook for raking out, £5 to £12.
- •Powdered setting filler: Toupret Interior Filler 1.5kg at £11 to £14, or Gyproc EasiFill 45, 10kg for £17 to £22. Powders set chemically rather than drying, so they shrink far less than ready-mixed tubs.
- •Fibreglass scrim tape, 48mm x 90m, £4 to £7, and flexible acrylic caulk at £3 to £5.
- •Sanding sponges in 120 and 180 grit, £2 to £4 each, plus FFP3 masks.
- •Stabilising primer or contract matt for spot-priming, 2.5L for £12 to £20.
Realistic Time and Cost: DIY Against Bringing Someone In
Allow 15 to 25 minutes of hands-on work per crack, spread over two or three visits: setting filler wants two to four hours between coats, a deep fill wants overnight. A bedroom with three cracks is a weekend job.
For 2026, a decorator charges £110 to £170 for a half day and £190 to £280 for a full day, rising to £400 in London — handyman rates for small jobs explains minimum charges. Plasterers run £220 to £300 a day outside London, £320 to £450 inside it. Skimming one wall is £150 to £250; walls and ceiling in a 3.5m by 3m bedroom, £550 to £900.
- •Three hairline cracks in a bedroom, DIY: £28 of materials and three hours across two evenings. By a decorator it is a half day at £130 to £170, of which perhaps £12 is filler — labour roughly 92 per cent.
- •A blown lath-and-plaster patch of 0.8 square metres: £220 to £320, of which £30 to £45 is bonding coat, multi-finish, scrim and a board offcut.
- •One bedroom wall plus ceiling re-skimmed: £600 to £750 — £70 to £95 of materials against £520 to £660 of labour.
How to Read a Quote for Plaster Repairs
Labour should land between 75 and 90 per cent of the total, and that one ratio catches most nonsense. If a patch repair loads a third of the price onto materials, ask for the list — there is not £100 of plaster in a square metre of wall.
A reasonable quote is written, priced per wall or per square metre, states the number of coats, and says whether sheeting up and rubble removal are included. Red flags: a day rate under £150 in 2026, cash up front, no minimum charge mentioned, or a re-skim priced off a phone photo by someone who never tapped the wall. Be wary too of anyone who sees a crack and recommends injected damp-proofing — cracks are movement, not moisture.
The Step-by-Step Repair
This is the sequence for a stable, non-structural crack in sound plaster. For bigger failures, see how to repair old plaster walls.
- •1. Sheet the floor, open a window and mask the skirting with low-tack tape.
- •2. Rake the crack into a shallow V, 3 to 5mm wide and no deeper, undercut slightly so the groove is wider at the back and the filler keys in.
- •3. Brush and vacuum out every crumb, then dampen the groove. On porous lime plaster, seal with PVA diluted four to one and fill while it is tacky.
- •4. Over 2mm, or on any crack that has returned before, bed fibreglass scrim tape into a thin coat of filler along the line. Tape bridges movement; filler alone does not.
- •5. Mix powdered filler to a stiff, non-slumping paste and press the first coat in with the 50mm knife, working across the crack rather than along it.
- •6. Once set — two to four hours, not tomorrow — lay a second coat with the 150mm knife, feathered 75mm either side and barely proud. Scrimmed repairs want a third pass.
- •7. At ceiling, architrave and skirting junctions, skip rigid filler and run flexible caulk, tooled with a wet finger. Those joints move every winter.
- •8. Sand by hand with 120 then 180 grit sponges. Never put a power sander on old plaster.
- •9. Spot-prime the repairs, then paint the whole wall corner to corner so the sheen matches.
Troubleshooting: When the Repair Misbehaves
- •The repair sinks as it dries: the coat was too thick. Build in 3mm layers.
- •A dull or shiny patch flashes through the paint: bare filler is more absorbent than the wall. Prime, then repaint wall to wall, never just the patch.
- •The same line reopens within weeks: that is movement, not a filling failure. Scrim it, or use flexible caulk at junctions. If cracks keep returning across the wall, read why cracks keep coming back.
- •The plaster sounds hollow around your neat repair: the key has failed, so cut back to sound material or the crack will travel.
- •Fine crazing across a whole wall: usually old distemper or emulsion over bare plaster with no mist coat. That is a re-skim, not a filling job.
When to Stop and Call a Professional
The line is not about confidence, it is about what the crack means. Filling a structural crack destroys the record of how fast the building is moving, which is exactly what a surveyor needs. For hairline work and small holes, filling cracks and holes in walls gets you an invisible finish. Past this list, hand it over.
- •Diagonal or stepped cracks over 5mm, especially from window and door corners or widening towards the top. Book a structural engineer's report at £400 to £700 rather than a builder — the engineer has nothing to sell you. Start with settling cracks vs structural cracks.
- •Doors or windows that have started binding, or the same crack visible on both faces of a wall.
- •Any ceiling sagging, bowing or sounding hollow over more than half a square metre.
- •Cracks with damp staining, salt bloom or a musty smell — solve the water first.
- •More than two square metres of blown plaster on one wall. Patching then costs more of your time than a plasterer charges to skim it.
Found this useful?
There's plenty more — hundreds of guides and honestly-tested product reviews for every corner of your home.
Browse All Guides