Energy & Insulation · 6 min read · 13 July 2026
How to Insulate an Attic: A UK Loft Insulation Guide
Most British lofts hold 100mm of flattened 1980s wool and a worn path to the water tank. Here is how to get to a proper 270mm without falling through the ceiling or creating a condensation problem.
By the Nims Casa editorial team — written from professional cleaning experience and checked against our editorial standards.
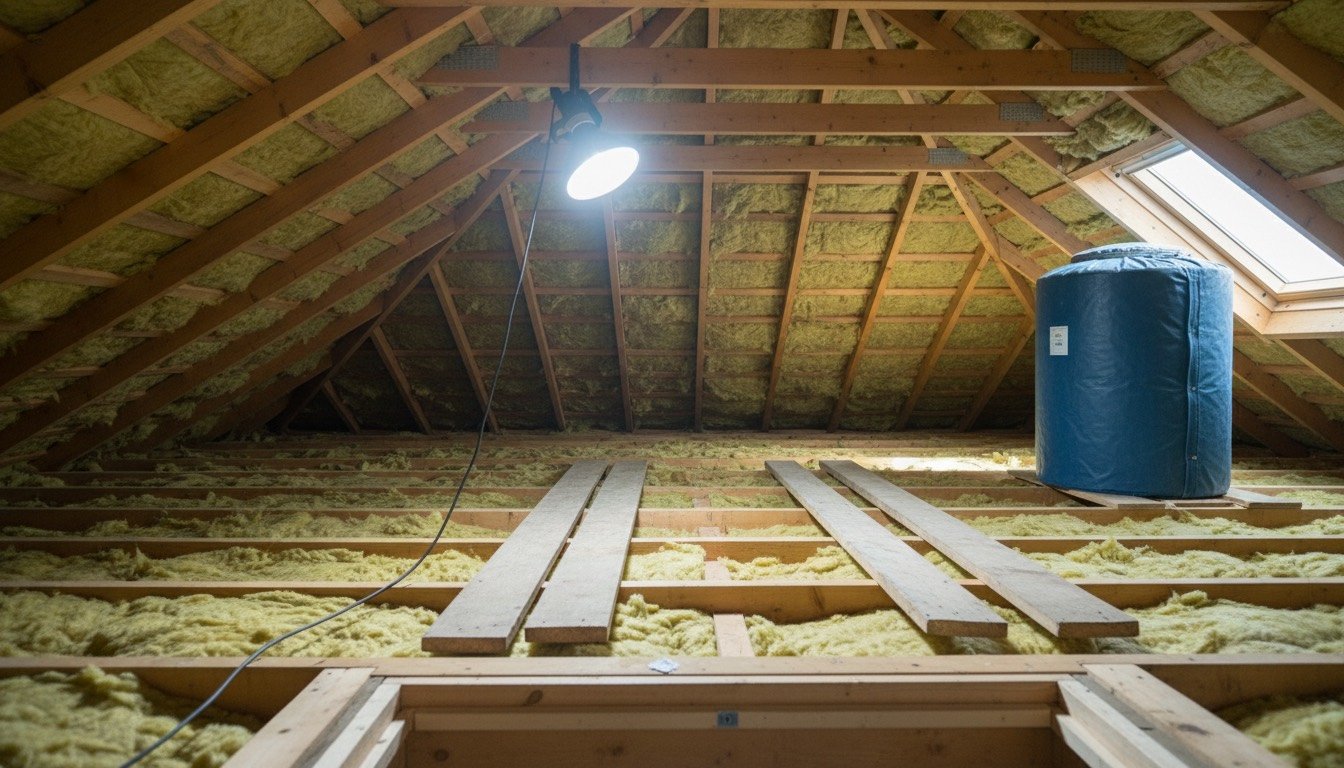
Almost every loft I open in a pre-2000 house tells the same story: 100mm of grey, trodden-down mineral wool, pulled back where somebody ran an aerial cable, and a path worn through it to the water tank. Getting that up to 270mm still pays for itself in a few years, but only if you do the unglamorous parts first.
This is a cold loft job, which is what most UK houses have: insulation at ceiling level, roof space left cold and ventilated above it. Insulating at rafter level instead belongs with a proper loft conversion.
Safety first: what actually goes wrong up there
Two things hurt people in lofts, and neither is the insulation. Plasterboard carries no weight, so every step and knee has to land on a joist or a board — go between them and you drop into the bedroom below, which is a £300 to £500 repair.
The other is dust: mineral wool fibres itch for two days, so wear the kit and shower in cool water the moment you come down.
- •FFP3 mask, sealed goggles, gloves, long sleeves and old trousers taped at the ankles.
- •Two crawl boards moved as you go, plus an LED light clipped to a rafter — holding a torch costs you the hand you need for the roll.
- •Pre-2000 house: grey-white board around the tank or flue, or loose granular fill, means stop and get it sampled. Asbestos insulating board around old cisterns is common and is not a DIY removal.
- •Bats are protected under the Wildlife and Countryside Act 1981. Droppings on the joists or an ammonia smell means you stop and ring the Bat Conservation Trust. Disturbing a roost is a criminal offence.
Tools and materials
Buy the lot before you start. Nothing wastes an afternoon like a trip to the merchants with fibres down your neck.
- •Mineral wool loft roll: 100mm for the first layer between joists, 170mm laid crosswise on top. Knauf Loft Roll 44, Isover Spacesaver and Superglass are the three in B&Q, Wickes and Screwfix.
- •Eaves ventilation trays, one per rafter bay at both eaves.
- •A serrated insulation knife, or long-handled secateurs, which cut rolls to width faster than any blade.
- •Loft-hatch draught strip and a 50mm PIR offcut to face the hatch.
- •Fire-rated loft caps if there are downlights in the ceiling below.
- •Pipe lagging with a 19mm wall, a cistern jacket, and loft legs at £4 to £6 each if you want storage.
Realistic time, cost and savings
A three-bed semi has 35 to 45 m² of loft floor. Allow five to eight hours alone to take a bare loft to 270mm, or three to four for a top-up, plus an hour for the hatch, tank and pipework. Pick a cool, dry day.
Materials run £280 to £380 for a full 270mm across 40 m², or £200 to £260 for the top-up layer alone. An installer will do the same house for £400 to £900 — but check first whether you qualify under the Great British Insulation Scheme or ECO4, because self-installing usually forfeits the grant.
Be honest about payback. Nothing to 270mm in a semi saves around £300 a year at current unit rates; topping up from 150mm saves nearer £25. For your own house rather than an average, an energy audit shows where the heat actually goes, and it is usually the draughts.
The step-by-step method
- •1. Empty the loft and hoover the joist bays. Working around boxes guarantees gaps, and gaps are where the heat goes.
- •2. Air-seal the ceiling before insulating: mastic or foam around the soil vent pipe, hatch frame, extract ducts and cable holes. Same principle as draught-proofing downstairs — seal first, then insulate.
- •3. Fit eaves trays at both edges so the wool cannot block airflow. You need 25mm clear minimum, and older bitumen-felt roofs depend on it, which is why loft ventilation is not optional.
- •4. Handle downlights and cables now: loft caps over spotlights, or 75mm clear of any fitting not marked insulation-coverable, and lift cables so they sit on top of the finished insulation, not buried in it.
- •5. Lay the first layer between the joists, friction-fit and level with the joist tops. UK joists are usually 100mm deep at 400mm or 450mm centres. Butt the ends tight; never stretch or compress it.
- •6. Lay the 170mm layer at right angles across the joists, covering the timber. That crosswise layer kills the thermal bridge through the joists, and it is the part people leave out.
- •7. Stop short of the cold water cistern: insulate its sides and lid, but leave the ceiling beneath it bare so house warmth keeps it from freezing.
- •8. Insulate and draught-strip the hatch — 50mm PIR on the top face, foam strip round the frame. A bare hatch undoes a surprising amount of the work.
- •9. Lag every pipe, including the overflow. A loft at 270mm is a far colder loft than it was.
- •10. For storage, fit loft legs and board over the top. Boarding straight onto joists squashes 270mm back to 100mm and wastes the day.
Troubleshooting after the job
A newly insulated loft is a colder loft, and cold surfaces attract condensation. Most complaints afterwards trace back to that one change.
- •Damp patches or black spotting on the felt underside: warm moist air is leaking up from the house. Go back to the sealing step and check the eaves trays are clear.
- •Mould on a bedroom ceiling near the outside wall: a cold spot where insulation stops short at the eaves. Push the wool out to the wall plate without blocking the vent gap, then treat it with the usual damp and mould routine.
- •Insulation visibly flattened within a year: something is stored on it, or it was boarded over. Wool only works lofted.
- •A warm smell from a spotlight, or pipes freezing for the first time: insulation touching a non-rated fitting, or lagging missed.
The DIY-or-pro line: where to stop
Laying mineral wool is a competent-DIYer job in most UK houses, and paying £600 for two layers of roll in an accessible loft is money you did not need to spend. But there is a clear line.
Spray foam deserves its own warning. Sprayed onto rafters it has caused real difficulty with UK lenders and surveyors, and several banks have declined to lend on affected properties. It is never DIY, and it is worth reading how it compares with conventional mineral wool first.
- •Do yourself: mineral wool in an accessible cold loft, eaves trays, insulating and draught-stripping the hatch, lagging pipes, jacketing the tank, loft legs for light storage.
- •Use a professional: any rafter-level or warm-roof insulation, all spray foam without exception, and blown-in fibre, which needs a specialist rig.
- •Use an electrician: cables already buried in insulation need de-rating checks or re-routing under BS 7671, and non-fire-rated downlights should be swapped, not worked around.
- •Stop entirely: suspected asbestos, bats, an active roof leak, or black mould across the loft. Insulate over any of those and you seal the problem in.
- •Get a survey: no hatch access, headroom under about 1.2m, undersized joists, or a room-in-roof build. Those need structural assessment, not a roll of wool.
Found this useful?
There's plenty more — hundreds of guides and honestly-tested product reviews for every corner of your home.
Browse All Guides