Heating & Cooling · 5 min read · 2 July 2026
How to Change a Furnace Filter in a UK Warm Air Heating System
Ducted warm air heating still runs in a few hundred thousand UK homes, and almost none of them get the filter changed on time. It is a ten-minute job costing under £20 — here is the honest version.
By the Nims Casa editorial team — written from professional cleaning experience and checked against our editorial standards.
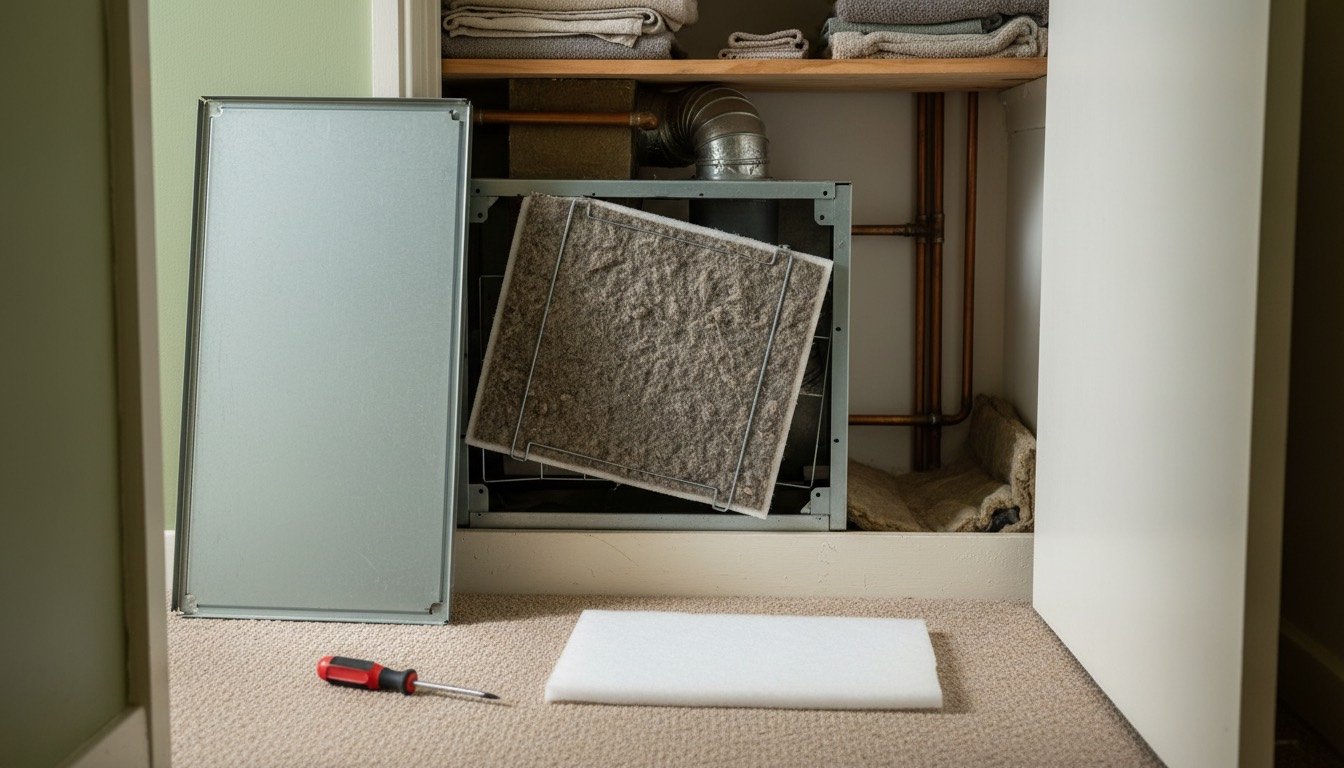
Ducted warm air heating never took hold here the way it did in North America, but several hundred thousand British homes still run one — mostly on 1960s and 70s estates around Milton Keynes and central Scotland. If your heat arrives through floor or wall grilles rather than radiators, you have a warm air unit in a hall cupboard, and it has a filter somebody is supposed to change.
Almost nobody does. We routinely pull out grey felt mats three seasons old, so loaded the fan can barely draw through them. That one pad sits behind a large share of the limit-stat lockouts and cold end rooms we get called to. It is also the cheapest maintenance in the house, so this guide costs it openly: the filter, the engineer, and where the line between them falls.
Safety first: where user maintenance stops and Gas Safe work starts
The filter sits on the return-air side, outside the sealed combustion compartment, which is why changing it is legitimate homeowner maintenance. Everything past the burner cover is notifiable work under the Gas Safety (Installation and Use) Regulations 1998 and belongs to a Gas Safe engineer. Warm air units share a fan housing with the heat exchanger, so a crack there pushes combustion products into the air you breathe — read our guide to preventing carbon monoxide poisoning first.
- •Isolate at the fused spur, not just the thermostat, and wait 5 to 10 minutes. The fan free-wheels and the exchanger stays above 60°C after shutdown.
- •Never remove the burner cover, sight-glass plate or flue collar. That is the Gas Safe boundary, not a suggestion.
- •Fit an audible CO alarm to BS EN 50291-1, 1 to 3 metres from the unit at head height: £18 to £30.
- •Never run the system with the filter out. Unfiltered return air coats the exchanger fins and causes early failure.
- •If you smell gas, stop, ventilate, leave electrics alone and ring 0800 111 999.
Tools, materials and what they honestly cost
This is a screwdriver-and-tape-measure job; the expensive part is never the filter.
- •Cut-to-size polyester or foam filter sheet, 1m x 0.5m x 25mm: £9 to £18, enough for two to four changes.
- •Ready-cut pleated panel filter, G4 or ePM10 grade, in a common warm air size: £8 to £22 each.
- •Washable aluminium mesh cut to your rack: £25 to £45 once, then just warm water and washing-up liquid.
- •MVHR filter set (coarse G4 plus fine F7), if what you have is heat-recovery ventilation: £22 to £60.
- •Tools: cross-head screwdriver, tape measure, marker pen, torch and a vacuum with a brush head.
Time, professional prices and the labour-versus-materials split
First time through, allow 15 to 20 minutes, most of it finding the rack. After that it is five minutes. DIY costs £9 to £22 a change, or £25 to £50 a year on a pad cleaned monthly and replaced annually. Frequency depends on pets, roadside dust and runtime — our guide to how often to change your air filter breaks it down by household.
Have an engineer do it and you are buying labour, not a filter. A Gas Safe annual service on a warm air unit runs £90 to £150 across most of the UK, £120 to £190 inside the M25. The filter is £10 to £25 of that — around 15 per cent materials — and the balance is 60 to 90 minutes cleaning the burner, running a flue gas analysis and checking the limit stat and fan overrun. That is a fair bill.
What is not fair: a £120 to £180 call-out purely to slide a pad into a rack with no service attached. Nor is being told, after a filter visit, that the unit needs replacing at £4,000-plus without an analyser reading, a CO figure or visible cracking to back it. Get the numbers in writing, take three quotes, and read our replacement cost breakdown first — converting a warm air house to wet radiators is a very different price to a like-for-like swap.
The step-by-step filter change
Work in this order. Steps 1 to 3 are the ones people skip.
- •1. Set the thermostat off so the unit cannot call for heat mid-job.
- •2. Isolate the electrical supply at the spur and wait for the fan to stop completely.
- •3. Find the filter: either a slide-out rack in the base of the cabinet behind the lower front panel, or behind the large return-air grille in the hall wall.
- •4. Photograph it in place and note the airflow arrow. It always points towards the fan and exchanger, never away.
- •5. Slide the old filter out flat into a bin bag held against the opening. Lift it clear and you redistribute three seasons of dust into the hallway.
- •6. Vacuum the rack, the fan grille and the mouth of the return duct. Do not push the nozzle deep into ductwork.
- •7. Measure the rack, not the old filter, in millimetres. Old pads distort, so copying them gives you an undersized replacement.
- •8. Fit the new filter arrow-in. Cutting foam, go 3 to 5mm oversize each side so it seats under compression — a 5mm bypass gap passes more dirt than a filthy filter does.
- •9. Write the date on the edge in marker.
- •10. Refit the panel, restore power and run for 10 minutes. Check for whistling at the panel, warm air at every grille, and a steady fan note.
Troubleshooting: what goes wrong straight afterwards
Most post-change complaints trace back to the fit, not the filter.
- •Whistling or a draught at the access panel: filter undersized or panel not seated. Recut and reseat.
- •Fires, runs 10 to 15 minutes, cuts out: limit-stat lockout from restricted airflow. Check no grilles are shut and step down to a coarser grade. If it persists, work through our warm air unit troubleshooter.
- •Cool air at start-up: normal for 30 to 60 seconds. Beyond two minutes, see why a warm air unit blows cold air.
- •Hot dust smell on first run: expected, clears within 10 minutes. Acrid or plasticky instead, isolate and call an engineer.
- •One room still cold: that is duct balancing, not filtration — why one room is colder than the rest covers the damper adjustments.
When to stop and call a Gas Safe engineer
Some findings mean you close the panel, leave the system off and pick up the phone: sooty or yellow-brown staining around the casing or grilles, a lazy yellow flame instead of crisp blue, a thump on ignition, streaming window condensation whenever the heating runs, a CO alarm that has ever sounded, or repeated lockouts on a clean filter. None of those are fixable from the return-air side.
Age matters too. Many surviving UK warm air units are 30 to 45 years old, spares are scarce, and a cracked heat exchanger at that vintage usually ends it. Budget £90 to £150 for a diagnostic visit with a written flue gas analysis, and treat that reading as the evidence for replacement. Otherwise, fold the filter into the jobs on a proper winter heating system checklist: a £15 pad twice a year quietly protects a four-figure appliance.
Found this useful?
There's plenty more — hundreds of guides and honestly-tested product reviews for every corner of your home.
Browse All Guides