Garden & Outdoor · 5 min read · 4 June 2026
How to Insulate a Shed: Diagnose the Damp First, Then Board It Out
Most sheds in this country get insulated twice — once badly, once properly. The difference is whether you worked out where the water was coming from before you bought the boards.
By the Nims Casa editorial team — written from professional cleaning experience and checked against our editorial standards.
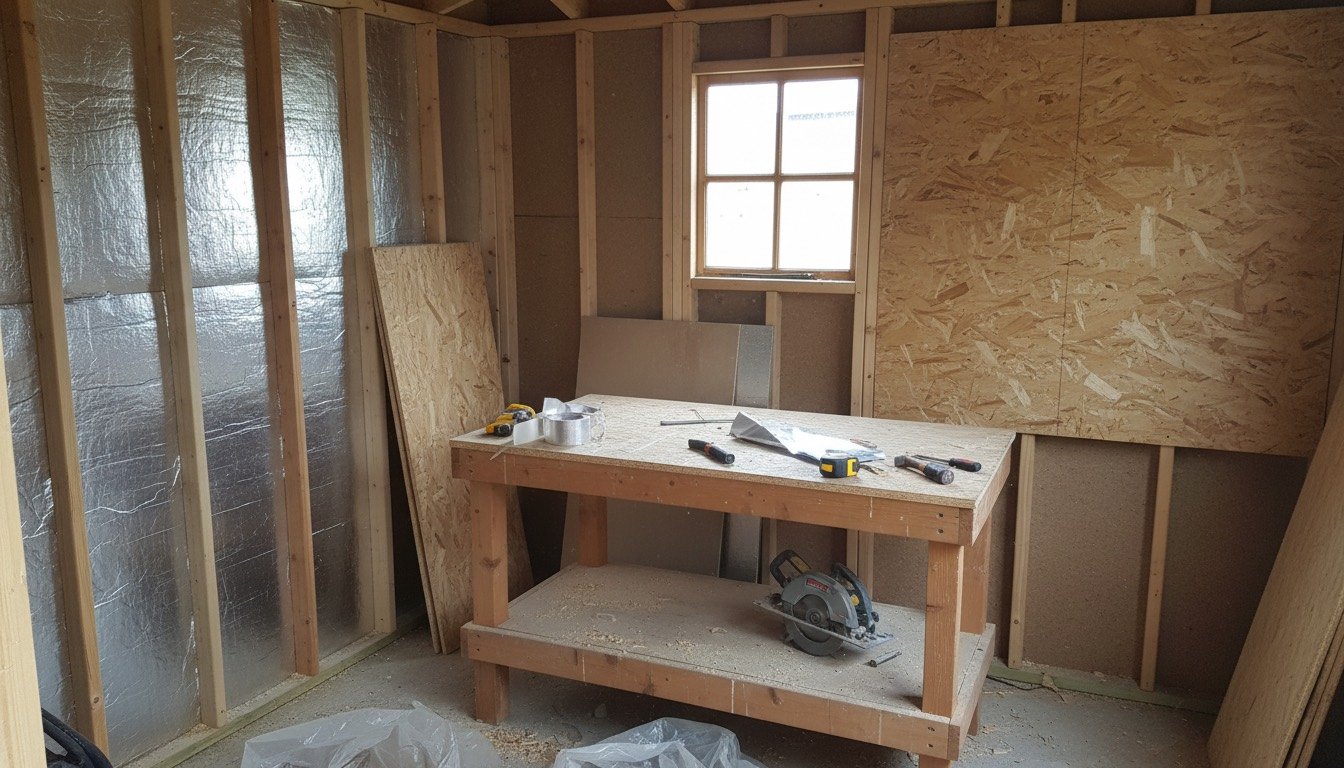
The classic sequence goes like this. Loft roll gets stuffed between the studs in October, OSB goes over the top, and by the following March the bottom 150mm of that OSB is grey-black and the chisels on the rack have gone orange. The insulation was not the problem. The diagnosis was.
Insulation does not remove moisture, it moves the dew point. Put it in a shed that is already taking on water — from a felt lap, from a slab with no damp-proof membrane, or from your own breath in an unventilated box — and you shift the condensation from a cold surface you can see to a cavity you cannot. So the first hour of this job is spent looking, not buying.
Start With a Diagnosis, Not a Shopping List
Go out on the first cold, still morning after a clear night, before the sun hits the roof. That is when a shed tells you the truth. Match what you see to one of these four pictures.
- •Fine water droplets spread evenly across the whole underside of the roof sheet, often dripping onto whatever is directly below — condensation. The air inside is warmer and wetter than the roof deck. You need ventilation and a vapour control layer as much as you need insulation.
- •One stain running down a single rafter, or a dark ring around a roofing nail, or a wet patch that only appears after rain rather than after a cold night — a leak. Sort the covering before anything else; the principles in our guide to finding and fixing a roof leak apply just as well to felt and EPDM on a shed. Insulating over an active leak will rot the frame inside two winters.
- •Dark, cold damp in the bottom 200mm of the walls, a floor that never fully dries, and mildew on anything stored at ground level — moisture coming up from the base. Either the shed sits in a hollow that puddles, or there is no membrane under it. That is a shed foundation job first, and the same physics as damp and mould indoors.
- •Bone dry everywhere, just genuinely cold — a straightforward heat-loss problem. Crack on.
Then Decide How Much Insulation the Use Actually Justifies
The second question is what the building is for, because a mower shed and a home office need very different specifications and there is no sense paying for one when you need the other.
- •Storage only — mower, bikes, half-used tins of masonry paint. You want frost protection, not warmth. 25mm PIR in the roof, good draught-proofing round the door, and two vents. Around £70 to £130.
- •Occasional workshop, a few hours at a weekend with a heater on. 50mm PIR in walls and roof, floor left alone or given 25mm under a ply overlay. Roughly £180 to £350 on an 8ft x 6ft.
- •Daily use — office, gym, studio. 50-70mm PIR everywhere including the floor, all joints taped, and a trickle vent or small extractor. Anything less and you will heat the garden through the walls all winter.
- •Metal or concrete sectional shed. Do not press board tight against the skin. Batten out 25mm first so air can move behind, or you will simply relocate the condensation.
Safety First
Nothing here is high-risk work, but three things catch people out every year.
- •Corrugated cement roof sheets on anything built before 1999 may contain asbestos. Do not cut, drill or break them. Leave them alone or get a licensed removal quote.
- •Never leave foil-faced PIR as a finished internal surface. It must be covered with 9mm OSB, 6mm ply or 12.5mm plasterboard. Bare rigid foam is a serious fire risk in a building full of petrol, white spirit and battery chargers.
- •Cutting PIR throws fine irritant dust. FFP3 mask, gloves, long sleeves, and cut outside on a still day.
- •If there is a supply to the shed, isolate it at the consumer unit and prove dead before you board over any cable. New outbuilding circuits are notifiable — this sits firmly in the category of electrical work you should not DIY.
Tools, Materials and What It Really Costs
For a typical 2.4m x 1.8m (8ft x 6ft) apex shed with 44mm framing, you are looking at about 16m² of wall, 5m² of roof and 4.3m² of floor.
Two full days for a first-timer, or a comfortable weekend if you have done joinery before. Cutting PIR accurately is the slow part — allow 20 minutes per wall bay until you find your rhythm. Total materials land between £220 and £420 depending on thickness and lining, which is broadly in line with the per-square-metre figures in our insulation cost guide.
- •Tools: tape, pencil, fine-tooth handsaw or insulation knife, cordless drill/driver, jigsaw or circular saw for the lining sheets, staple gun, sealant gun, spirit level, FFP3 mask.
- •50mm foil-faced PIR: roughly 8-9 boards at 2400 x 1200mm, £32-£48 each.
- •Foil vapour tape (75mm x 45m), £9-£14 a roll — you will use most of one.
- •9mm OSB3 lining, 6-7 sheets at £22-£30 each, or 6mm ply if you want a paintable finish.
- •Expanding low-expansion foam or flexible sealant for edge gaps, £8-£12.
- •Two hit-and-miss vents or soffit vents, £6-£10 each. Not optional.
- •50mm and 75mm screws, breather membrane if the cladding is overlap board rather than shiplap, £25-£40.
The Method, Step by Step
Work top down so any dust and offcuts fall onto floor you have not finished yet.
- •1. Empty the shed completely and let it dry for a week with the door propped open. Boarding damp timber in is the single most common mistake.
- •2. Check and fix the covering. Re-felt, patch or replace any lap that is lifting, and clear the perimeter so ground level sits at least 150mm below the floor deck.
- •3. On overlap cladding, staple a breathable membrane to the inside face of the studs first. This stops wind-driven rain reaching the insulation while still letting the timber dry outward. Shiplap sheds with a decent finish can skip it.
- •4. Measure each bay individually — shed framing is never square. Cut PIR about 3mm oversize so it friction-fits and stays put without fixings.
- •5. Press each board in flush with the front of the stud, then foam or seal any gap wider than 3mm around the edges. Gaps are what kill performance; a 5% unsealed area costs far more than 5% of the heat.
- •6. Tape every joint and every stud face with foil tape. That tape, plus the board facing, is your vapour control layer — it keeps interior moisture out of the cold cavity.
- •7. Do the roof the same way, working between the rafters, but leave a 25mm ventilated gap above the insulation if the roof deck is solid boarding under felt. Cold-roof build-ups need that air path.
- •8. Insulate the floor only if you will use the shed regularly: lift or overlay the deck, lay 25mm PIR between joists or across the boards, then 18mm ply or OSB over the top.
- •9. Line out with OSB or ply, screwing at 300mm centres into the studs. Leave a 5mm expansion gap at floor and ceiling and cover it with a timber bead.
- •10. Fit the two vents on opposite walls, one low and one high, and seal the door with brush strip and a compression seal. Ventilation and airtightness are not opposites — you want controlled air movement, not random draughts.
Troubleshooting After the First Winter
If something is wrong, the symptom tells you which stage failed.
- •Damp patches at the bottom of the lining only — moisture from the base, not the walls. Check drainage and the DPM under the shed.
- •Musty smell but no visible water — insufficient air change. Add or enlarge vents, and run a small unit like the ones in our dehumidifier guide for a fortnight to dry the fabric out.
- •Cold spots you can feel with a bare hand along stud lines — thermal bridging through the timber. Normal, and fixable with a 25mm insulated overboard across the whole face.
- •Condensation reappearing on the inside of the new lining — the vapour layer leaks somewhere. Nine times out of ten it is untaped joints behind a shelf bracket or around a window reveal.
- •Shed noticeably warmer but heating bills unchanged — you almost certainly have an uninsulated single-glazed window doing more damage than the walls ever did.
When to Stop and Call Someone
Insulating between studs and boarding out is well within reach of a competent DIYer. Three things are not. Any new or altered electrical supply to an outbuilding needs a qualified electrician and notification. Suspected asbestos cement needs a licensed contractor. And a shed that is rotten at the sole plate needs structural repair before insulation, because you will be fixing lining sheets to timber that will not hold a screw in three years.
There is also a point where the sums stop working. If you are converting a 3m x 4m building into a genuine year-round room, you have crossed from shed insulation into garden-room territory — different construction, different glazing, and potentially different rules, which is worth checking against the permitted development limits for outbuildings before you spend. At that scale, and for anything attached to the house, the approach in our garage insulation guide is a closer match to what you actually need.
Found this useful?
There's plenty more — hundreds of guides and honestly-tested product reviews for every corner of your home.
Browse All Guides